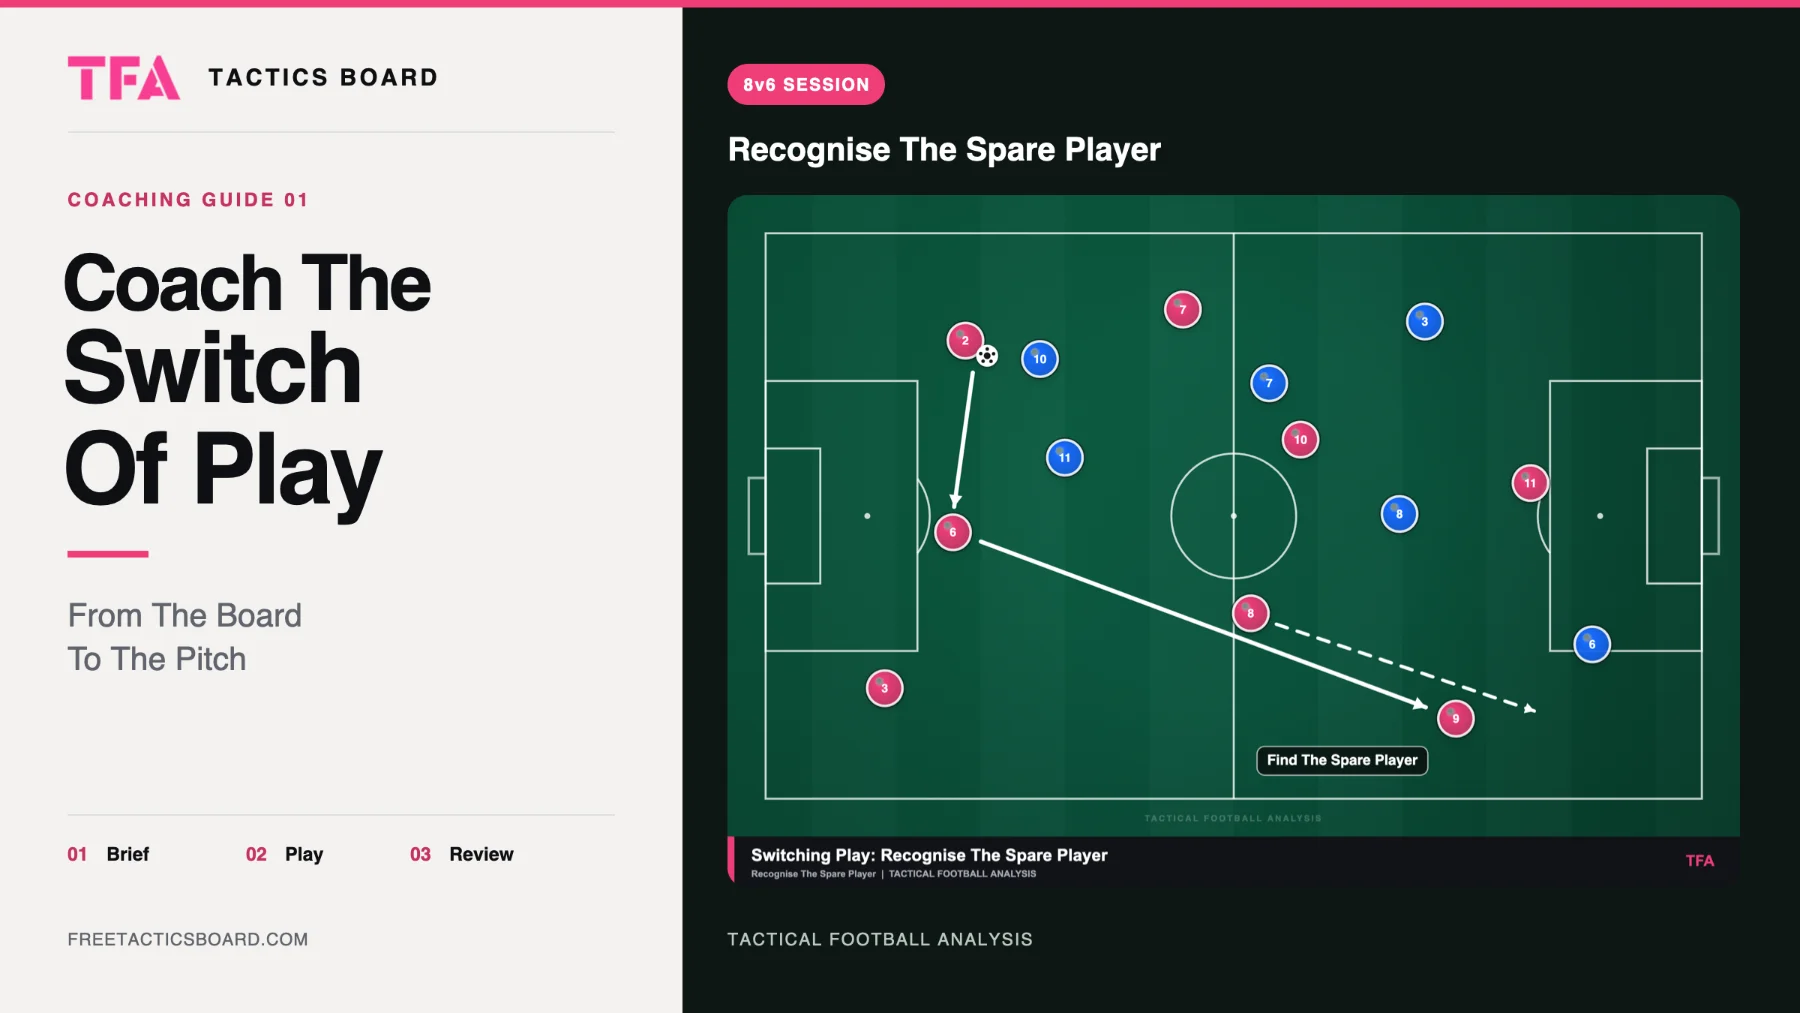
11 on 11 Soccer Positions and Their Roles Explained

If a full-back steps into midfield, has the player abandoned the position or fulfilled it? A conventional line-up cannot answer that question because it shows where players start, not what they must recognise as play develops.
Understanding 11 on 11 soccer positions means connecting each position to decisions: when to advance, where to offer support and who protects the space left behind. The formation provides the starting framework. The players' responsibilities make it work.
Table of Contents
The 11 Positions and Their Roles
Under IFAB's Laws of the Game, each side fields 11 players, including one goalkeeper, and a match cannot start or continue if either team has fewer than seven players. That leaves ten outfield players to arrange within a formation.
Formation numbers describe those outfield players, reading from defence towards attack. The goalkeeper is accounted for separately, rather than added to the defensive line.
Positions in an 11-a-side team, using a 4-3-3 as the example
Position | Abbreviation | Players in a 4-3-3 | Main responsibilities |
|---|---|---|---|
Goalkeeper | GK | 1 | Shot-stopping, commanding the penalty area, starting build-up with the first pass |
Centre-back | CB | 2 | Defending the central zone, covering space behind, progressing the ball from the back |
Full-back | FB | 2 | Defending width, overlapping or underlapping, covering the flank |
Defensive midfielder | DM | 1 | Shielding the defence, screening passes, recycling possession |
Central midfielder | CM | 2 | Linking defence and attack, pressing, supporting in both phases |
Attacking midfielder | AM | 0 | Creating chances between the lines, finding forwards in tight spaces |
Winger | W | 2 | Providing width, running in behind, crossing or cutting inside |
Striker | ST | 1 | Leading the line, finishing chances, holding up the ball for support |
The example totals one goalkeeper, two centre-backs, two full-backs, one defensive midfielder, two central midfielders, two wingers and one striker. The attacking-midfielder row has zero because there isn't a separately designated player in that position in this version of the shape.
That doesn't mean nobody creates chances between the lines. A central midfielder can perform that function, just as a winger can become the main finishing threat when an attack develops on the opposite flank. These are typical responsibilities, not fixed rules.
From position names to useful instructions
A position is a tactical role within a formation, rather than a fixed coordinate. The shirt label works like a job title; the role is the job description, including the decisions and relationships needed to perform it.
UEFA's technical analysis describes elite teams using a zonal back four with a 4-3-3 that often becomes a 4-5-1 without the ball. A coach therefore needs diagrams of both the starting structure and the defensive arrangement, rather than expecting a single line-up to explain everything.
A useful coaching diagram gives each player:
A reference zone: The area from which the player normally connects with play.
Nearest support options: Teammates who can receive, combine or provide cover.
A rotation trigger: The event that permits movement, such as a winger receiving securely.
A recovery position: The space to protect immediately after possession is lost.
A formation is an operating model of spacing, progression and cover, not a list of names.
The practical test is whether a player can explain the next action. Knowing where to stand matters less if the player cannot say when to move, which passing lane to offer or whose advance requires cover.
How Roles Shift Across the Phases of Play
A full-back receives near the touchline, passes forward, then moves inside to support the build-up. The starting position stays the same; the work changes with the phase. A football role-analysis study held by Middlesex University distinguishes position, where a player lines up, from role, the actions the player performs. That distinction helps coaches assess whether movement supports the team.
Typical role changes by phase of play
Phase of play | Position | Typical role change |
|---|---|---|
Build-up | Full-back | Stays wide or moves inside to help form a back three |
Build-up | Defensive midfielder | Drops between the centre-backs to receive and turn when pressure allows |
Defensive transition | Winger | Tracks back to restore width and cover the flank |
Defensive transition | Central midfielder | Presses the ball carrier and screens the central lane |
Settled defence | Winger | Joins the midfield line and protects the route into the full-back |
Attacking transition | Striker | Runs behind the last defender to stretch the back line |
Final-third attack | Full-back | Overlaps or underlaps to widen the attack and offer a crossing option |
These are common patterns, not fixed instructions. Each phase is a snapshot of the role at that moment.
Moving inside can mean two different things. A full-back may narrow beside the centre-backs to help secure the defensive platform, or advance into midfield to offer a passing option. Show the destination in the diagram so players can distinguish between those movements.
A defensive midfielder dropping between the centre-backs also needs a clear next action. The player scans before receiving and checks whether an opponent is following. If pressure closes the forward route, a return pass may be the better choice.
The trade-off behind an inversion
In a 4-3-3, a full-back may move into midfield as the winger holds the touchline. That gives the team another central passing option, but leaves the full-back's channel less protected if possession is lost.
The winger may need to recover into that space while a nearby midfielder delays the opponent's forward pass. Agreeing on those responses connects the attacking movement to the defensive transition.
Coaching question: Who takes responsibility for the space a moving player leaves?
A centre-back, for example, may carry the ball forward during build-up, support possession behind the attack, then defend depth after a turnover. The role changes as the ball and teammates move.
To explain those changes clearly:
Name the starting position to give players a reference.
Describe the action in each phase with verbs such as receive, screen, overlap or recover.
Identify the cover by specifying who responds if the movement breaks down.
Physical Demands Change With Position and Tactics
A centre-back in a 3-5-2 may face different running demands from one in a 4-2-3-1. The role label stays the same, but the formation changes which spaces the player must cover and how often they support play.
The diagram compares the two structures as a reference for discussing those demands. It does not prescribe individual running targets.
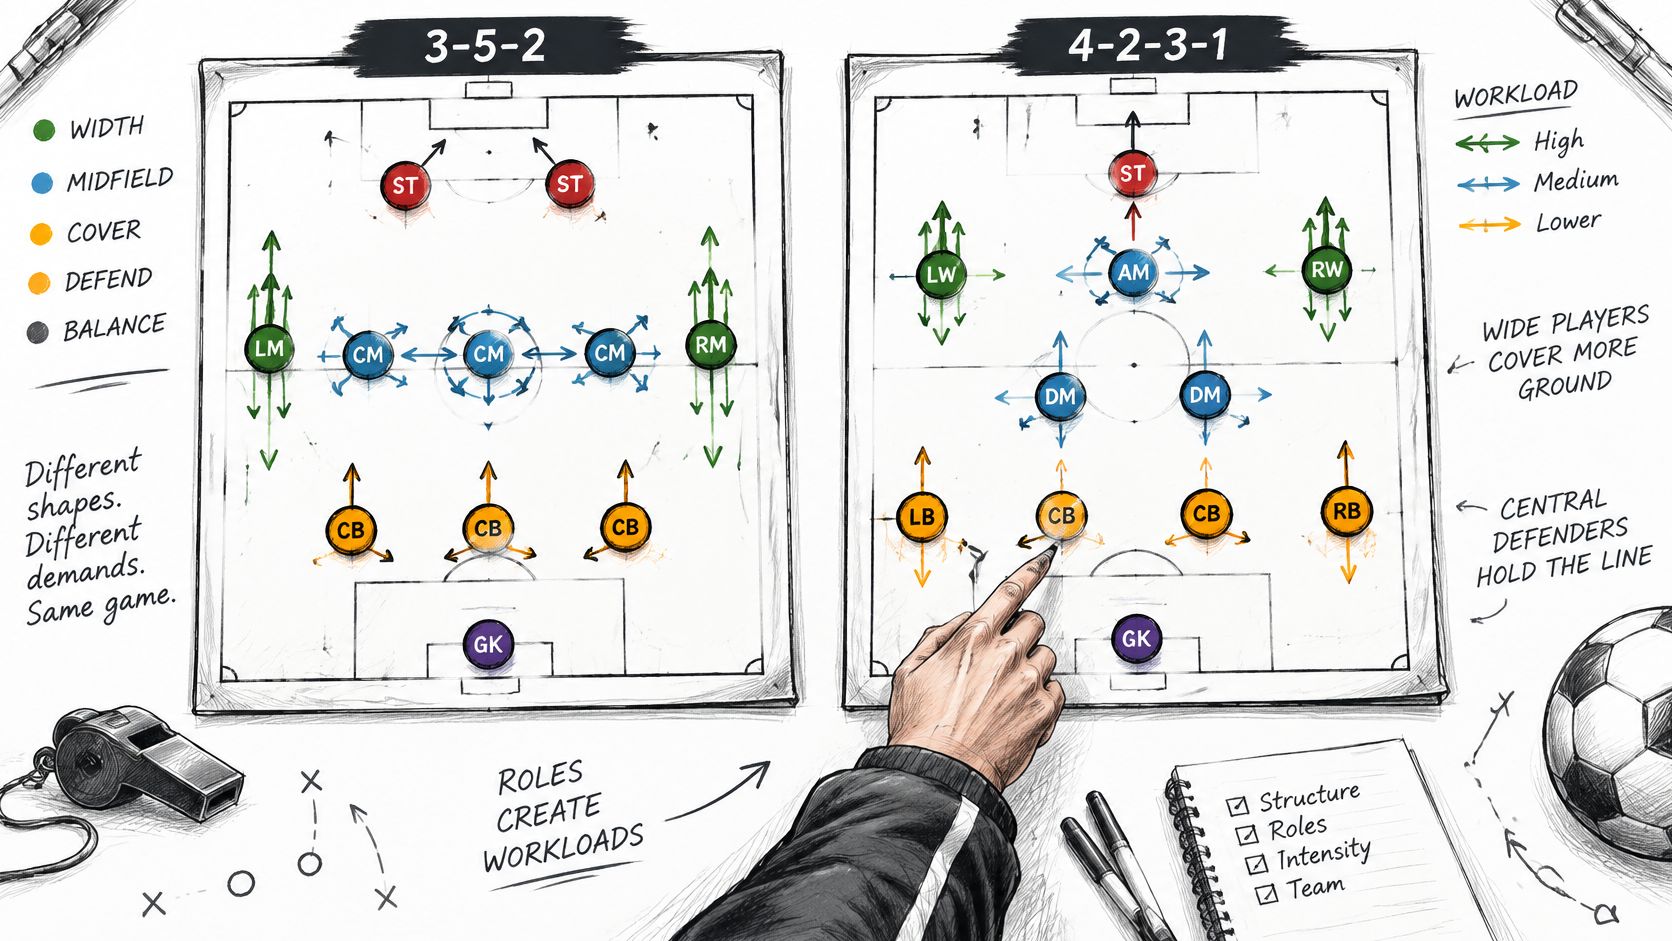
A published analysis of formation-related demands found that central defenders covered significantly greater total and low-speed running distances in a 3-5-2 than in a 4-2-3-1, with effect sizes of 0.33–0.34 and p < 0.01. It also reports greater passing output in 4-4-2 and 4-3-3 than in 4-5-1, and higher passing success in 4-4-2 than in those other structures.
The positional pattern adds another layer: central midfielders generally cover the greatest total distance, wide midfielders and full-backs produce the greatest sprinting distances, and wing-backs perform the highest number of accelerations, as reported in the same analysis.
Turning the findings into planning decisions
The findings show trade-offs between formations, not a single best structure. Use them to examine the actions your instructions ask players to repeat.
Behind advancing wing-backs: Identify which defender protects the wide channel and which midfielder prevents an easy central counterattack.
Around an advancing full-back: Agree how the holding midfielder and wide forward respond, so the team retains support behind the ball.
During repeated transitions: Include recovery movements that reflect the route back into the team's defensive structure.
Passing output also needs context. More completed passes may reflect available support, opposition behaviour or the team's approach. It does not automatically mean more effective progression.
Write workload scenarios, not generic targets
A centre-back defending a deep block may spend much of a practice adjusting position, checking runners and defending the penalty area. One asked to step into midfield must also recognise when to advance, receive under pressure and recover towards the defensive line.
Write a short scenario beside each position: starting location, movement trigger, repeated action and recovery route. This connects conditioning to the football problem the player must solve.
The useful question is which conditioning profile fits each position under the formation and instructions the team uses.
Coaching Each Position Through a Practice Session
A practice should show what each role must notice, do and cover when possession changes. For example, a full-back supporting a switch needs to judge when to advance, while a centre-back behind the attack must be ready to protect the space left open.
A LaLiga study summarised in the indexed professional-football workload paper analysed 8,426 match observations from 363 players across three seasons. It found that forwards showed the greatest acceleration capacity and central defenders the smallest. The paper also describes a separate 2025 study that found lower total distance for central defenders, full-backs and offensive midfielders in positional games than in possession games without positional roles.
Fixed acceleration thresholds can misjudge intense efforts: they may overestimate efforts that begin at low speed and underestimate those that start at higher speed. A coach should therefore connect movement targets to the action and role, rather than assume one threshold describes the same demand for every player.
A 9 v 9 switching-play session
Objective and player numbers
In a 9 v 9, including a goalkeeper on each team, practise switching play towards the free side. Players should recognise pressure, connect through a centre-back or central midfielder, then release the opposite winger or full-back.
Setup
Use a half-pitch with securely positioned goals, a marked middle zone and a wide gate on each flank. Each team has a goalkeeper, centre-back, full-backs, central midfielders, wingers and a striker. Assign any remaining roles to keep the sides balanced.
Start possession with a goalkeeper. Teams can attack directly when space is available. Alternatively, a switch through the opposite wide gate earns recognition before play continues towards goal.
Coaching cues
The full-back holds width until the winger begins a run, then chooses whether to support outside or underneath. The winger waits until the passer can look forward before moving, rather than arriving early beside a defender.
When possession is lost, the nearest central midfielder screens the opponent's first forward pass. The centre-back adjusts behind that pressure, while the striker stays available as an outlet if possession returns.
Progression
Add a defender-to-midfielder inversion as the ball travels across the back line. Count the passes between the switch becoming available and the receiver controlling on the free side. Use the count to discuss hesitation, not to rush the decision.
Adaptations to ability
Less experienced players can practise the receiving positions without the rotation trigger before defenders apply full pressure. More advanced groups can use a two-touch limit if it still allows players to scan and make purposeful decisions.
Observe the decision as well as the movement
Before praising a switch, check whether the receiver has useful support. A long pass to an isolated winger changes the ball's location but may leave the attack with no clear next action.
The guide to small-sided football games offers ideas for adjusting practice constraints. Before the session, identify each position's recognition cue, intended action and recovery duty. This makes the exercise about roles across phases, not just about reaching a spot on the pitch.
Substitutes and Bench Roles
Substitution planning involves separate layers: the starting XI is the active shape, the bench contains alternative role combinations, and substitution opportunities govern when changes can happen. A named substitute isn't automatically available to enter whenever the coach chooses.
Competition regulations determine how many substitutes can be used. Under The FA's Law 3 guidance, competitions permitting a maximum of five substitutes normally allow each team a maximum of three substitution opportunities, with half-time substitutions allowed in addition.
For senior A international matches, IFAB's latest law-change guidance distinguishes naming up to 15 substitutes from using up to eight, unless both teams agree in advance to increase the number used to 11; the three-opportunity restriction still applies.
Plan the role change before the replacement
A useful bench plan records more than matching position names.
Outgoing responsibility: What function will disappear when the player leaves?
Incoming contribution: Can the replacement perform that function, or does a teammate need a different task?
Team balance: Who provides width, central protection and a forward outlet after the change?
A winger replaced by a stronger defensive option may help protect a flank but offer a different threat in behind. The coach should decide whether the full-back can still advance or whether the team now needs a more cautious supporting position.
Hypothetical late-match example
A team trailing in a 4-3-3 brings on a striker and a second winger, with the incoming striker instructed to drop towards midfield. The coach checks which central midfielder covers the space behind that dropping movement and which forward attacks the depth it leaves available.
The substitutions should create complementary jobs, not a crowd of players asking for the ball in the same area. The bench-planning question is which replacement can take over each position's role without forcing an unintended change of shape.
Common Position Mistakes and How to Avoid Them
New players often learn position names before they learn the decisions attached to them. Coaches can correct that gap by replacing vague labels with short, observable instructions.
Labels that hide the job
Reading a shirt number as a role. A number is a convention, not a complete description of the player's responsibilities. The fix is to label the shirt number and the role together, so a midfielder's task might read receive behind the first press and protect the central passing lane.
That description gives the coach something to observe. It also avoids assuming that every player wearing the same number should behave identically.
Assuming full-backs only defend. A player may correctly join an attack yet be criticised for being beyond the defensive starting position. The fix is to add a transition duty to every full-back's description, making clear what happens immediately after the attacking involvement ends.
Instructions that stop too early
Treating a winger as only a width player: The fix is to add a recovery run to every winger's description, including the opponent or channel that must be protected.
Planning changes without checking eligibility: The fix is to check the competition's substitution rule before assigning bench movements and replacement roles.
A useful correction names an action rather than a personality trait. Work harder gives a winger little information; recover inside the opponent's wide receiver before pressing out describes a recognisable task.
Relabelling task: Replace the team's least useful position label with an action, a trigger and a defensive responsibility.
The coach should select the mistake most likely to occur in the team, rather than rewriting every instruction at once. Players can then explain the revised role back in their own words, and the coach can check whether the explanation matches the intended behaviour.
Draw Your First 11 on the Tactics Board
What should your first diagram explain? Choose one clear football question, such as how the right-sided players support possession and protect the flank when the ball is lost. A focused board is easier to read than one crowded with every possible movement.
TFA Tactics Board is a browser-based planning tool. Its free 11v11 pitch includes formations such as 4-3-3, 4-2-3-1, 3-2-5, 4-4-2, 3-4-3 and 5-4-1. You can position players, add the ball, passing arrows, running movements, labels, shirt numbers and team colours, then export the diagram as a PNG.
Build a readable coaching diagram
Start with the players' positions, then show how their jobs change during the action:
Choose the starting shape: Place all 11 players and check the team's balance before adding movement.
Map the football action: Use passing arrows for the ball and running movements for players. Keeping the two distinct makes the sequence easier to follow.
Add coaching detail: Note each player's nominal position, phase role and movement trigger. For example, a right-back might support possession, then recover when the pass forward is lost.
Check and communicate: Confirm the player count, positions and arrow meanings before exporting.
The football formation-builder guide can help you arrange the starting shape. If the recovery arrangement needs separate explanation, show it in another diagram rather than layering it over the first.
Keep free and membership workflows separate
The 9v9, 7v7, 5v5 and training-grid pitch formats require membership. The 11v11 full-size pitch and its listed formations are free.
Boards are stored in the current browser. For a first exercise, draw a 4-3-3 and label each player with both a nominal position and a phase role. Then add one movement trigger and one responsibility for the moment possession changes.
Prepared with the Outrank app