Soccer Formation Builder: Set Positions and Instructions

A coach has a shape in mind, the players look evenly spaced and the diagram already seems ready to share. But nobody has checked what happens when the opposition blocks the holding midfielder, or whether the wide forward knows when to move inside. A useful soccer formation builder makes those decisions visible before the squad steps onto the pitch.
Table of Contents
Choose the Shape and Define What the Board Must Show
Common 11-a-side shapes and the question each one raises
Shape | Line structure | Question the shape raises |
|---|---|---|
4-3-3 | 4 defenders, 3 midfielders, 3 forwards | How do wide forwards stretch the back line? |
4-2-3-1 | 4 defenders, 2 holding midfielders, 3 attacking midfielders, 1 striker | How do the two holders protect the back line during transitions? |
4-4-2 | 4 defenders, 4 midfielders, 2 forwards | How do the two banks of four and the two strikers interact in a compact block? |
3-4-3 | 3 defenders, 4 midfielders, 3 forwards | How do wing-backs widen the pitch without leaving gaps behind them? |
3-2-5 | 3 defenders, 2 midfielders, 5 attackers | How much space does a very advanced shape leave between the lines? |
5-4-1 | 5 defenders, 4 midfielders, 1 forward | How does a deep block cope with width and who leads the press? |
These labels describe outfield lines, not fixed responsibilities. A nominally defensive shape can leave poor cover if midfielders jump forward together; an advanced shape can retain protection through disciplined positioning behind the ball.
Treat spacing as a hypothesis
In a controlled 11-versus-11 study using 1-Hz player tracking, the PLOS ONE formation study found that 3-5-2 produced higher player length-to-width ratio and pressure-passing efficiency than 4-2-3-1, with no significant differences in effective playing space, team separateness or space-control gain. That isn't evidence that either formation wins every tactical problem.
Begin with the game model and phase: building against a high press requires different relationships from defending a lead. Place players for the intended spacing, add references for width, depth, vertical lanes and key zones, then draw the first action and the opponent's likely response.
The validation variables are effective playing space, length-to-width ratio, team separateness, space-control gain and pressure-passing efficiency. These concern occupied space, team proportions, separation, control and progression under pressure, rather than whether the diagram looks balanced.
A formation is a hypothesis about how players will use space, not proof that they will use it well.
Finish each board with a phase sentence naming the single variable the change should improve. For example: during build-up against a narrow press, stagger the midfield to improve pressure-passing efficiency.
How to Place Players on the Board
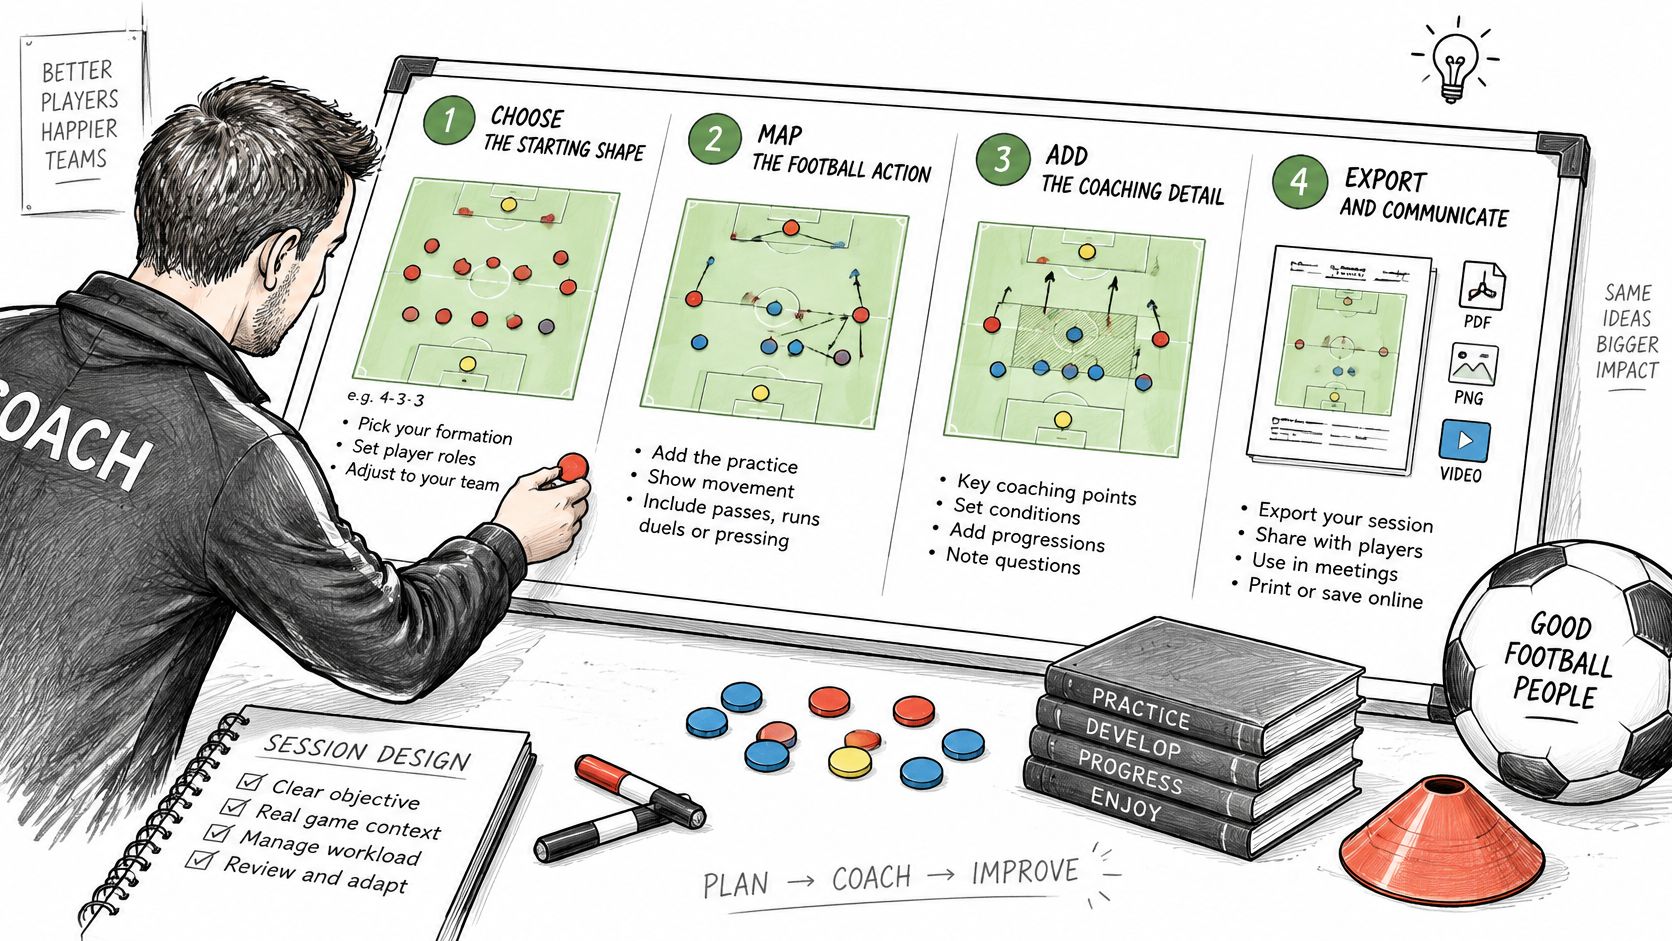
The working flow is straightforward: choose the starting shape, map the football action, add the coaching detail, then export and communicate. Positioning comes before decoration because a misplaced receiver can't be rescued by a better arrow.
Separate the core board from member tools
TFA Tactics Board (Free Tactics Board), by Tactical Football Analysis, provides browser-based formation setup, manual player positioning, the ball, pass and run arrows, labels, player numbers, team colours, coaching notes and PNG export without a software download. Its free formation library includes 4-3-3, 4-2-3-1, 3-2-5, 4-4-2, 3-4-3 and 5-4-1 on the full-size pitch.
Paid TFA member tools include advanced movement and drawing, zones, spotlights, focused pitch views, additional phases, the board library and sharing/presentation controls. The £9 membership includes multiple saved boards, equipment, small-sided pitches, portrait mode and complete colour control; member-only formation presets include 3-3-2, 2-3-1, 3-2-1 and 1-2-1. Storage stays local to the current browser, rather than providing cloud sync or real-time collaboration.
Build the starting picture
Name the phase and intended shape. Add a line such as build-up against a high press, with the intended structure beside it. Without the phase, players may mistake an attacking arrangement for their defensive positions.
Arrange the starting shape manually. Move players into relationships that suit the task rather than preserving tidy rows. Equal distances can look organised while leaving the ball carrier without an angled pass.
Place the goalkeeper, then the back line. Use labels or coaching notes to identify thirds and lanes. Leaving the goalkeeper out removes a potential supporting option and disguises the risk of an exposed goal.
Set midfield and attacking width and depth. Stagger wide players so the full-back and winger don't occupy the same passing line. Stacking them hides the space each should provide and can let a defender screen both.
Position the opposition in another team colour. Show the expected pressure, including the nearest presser and the player screening midfield. A random defensive block gives no reason for the attacking movement.
Place the ball at the first receiver. Make the starting possession unambiguous. A ball floating between players leaves the timing of every subsequent action unclear.
Add shirt numbers and role labels. Identify both the individual and the responsibility, such as holding midfielder or wide outlet. Numbers alone won't explain a changed role.
Temporarily remove the ball and labels. The remaining positions should still show where the team intends to stretch or compact; if they don't, revise the spacing before drawing movement.
How to Add Runs, Passes and Coaching Cues
An arrow should show the decision that makes the movement useful. The player needs to recognise what information to gather first, what the run depends on and what to do if the opening disappears.
Elite players communicate through positioning and body language as well as speech: the Vrije Universiteit Amsterdam account of elite football communication reports a median of 146 tactical expressions versus 52.5 emotional expressions among analysed players (p = .012, r = .89). Most of what players exchange on the pitch is tactical, so the board must show what the player perceives and communicates: draw the scan, the signal and the spoken cue with the same care as the arrow, since they carry more of the decision than the run itself.
Instruction layers to draw on the board
Layer | What to draw | Coaching check |
|---|---|---|
Trigger | A label or marker at the point that starts the move, such as the ball reaching number 6 | Can a player name the trigger without looking at the board? |
Movement | One pass arrow and one run arrow per phase, each with a player number | Does each arrow show a destination the player can reach in time? |
Communication cue | A scanning or body-orientation marker next to the receiver | Would the receiver know to check the shoulder before the pass? |
Response | A short note on what the team does after the next action, such as a switch or a recovery run | Is there a clear response if the opposition blocks the first option? |
Example of a conditional forward run
In a hypothetical example, number 2 passes to number 6 while number 9 attacks the half-space. The useful question is what the striker must see before running, because a finishing point means little if the run starts on a cue the defender controls.
Number 6 should scan before receiving and assess whether forward play is available. Number 9 checks the defender's position and the receiver's body shape; if number 6 receives facing backwards under pressure, the striker may need to drop back and offer support instead of continuing away.
Add communication prompts where they affect the decision. A full-back can signal an underlap before accelerating, while a midfielder can indicate the pressing trigger through position and body orientation.
Practical rule: Attach each movement arrow to the event that makes it possible.
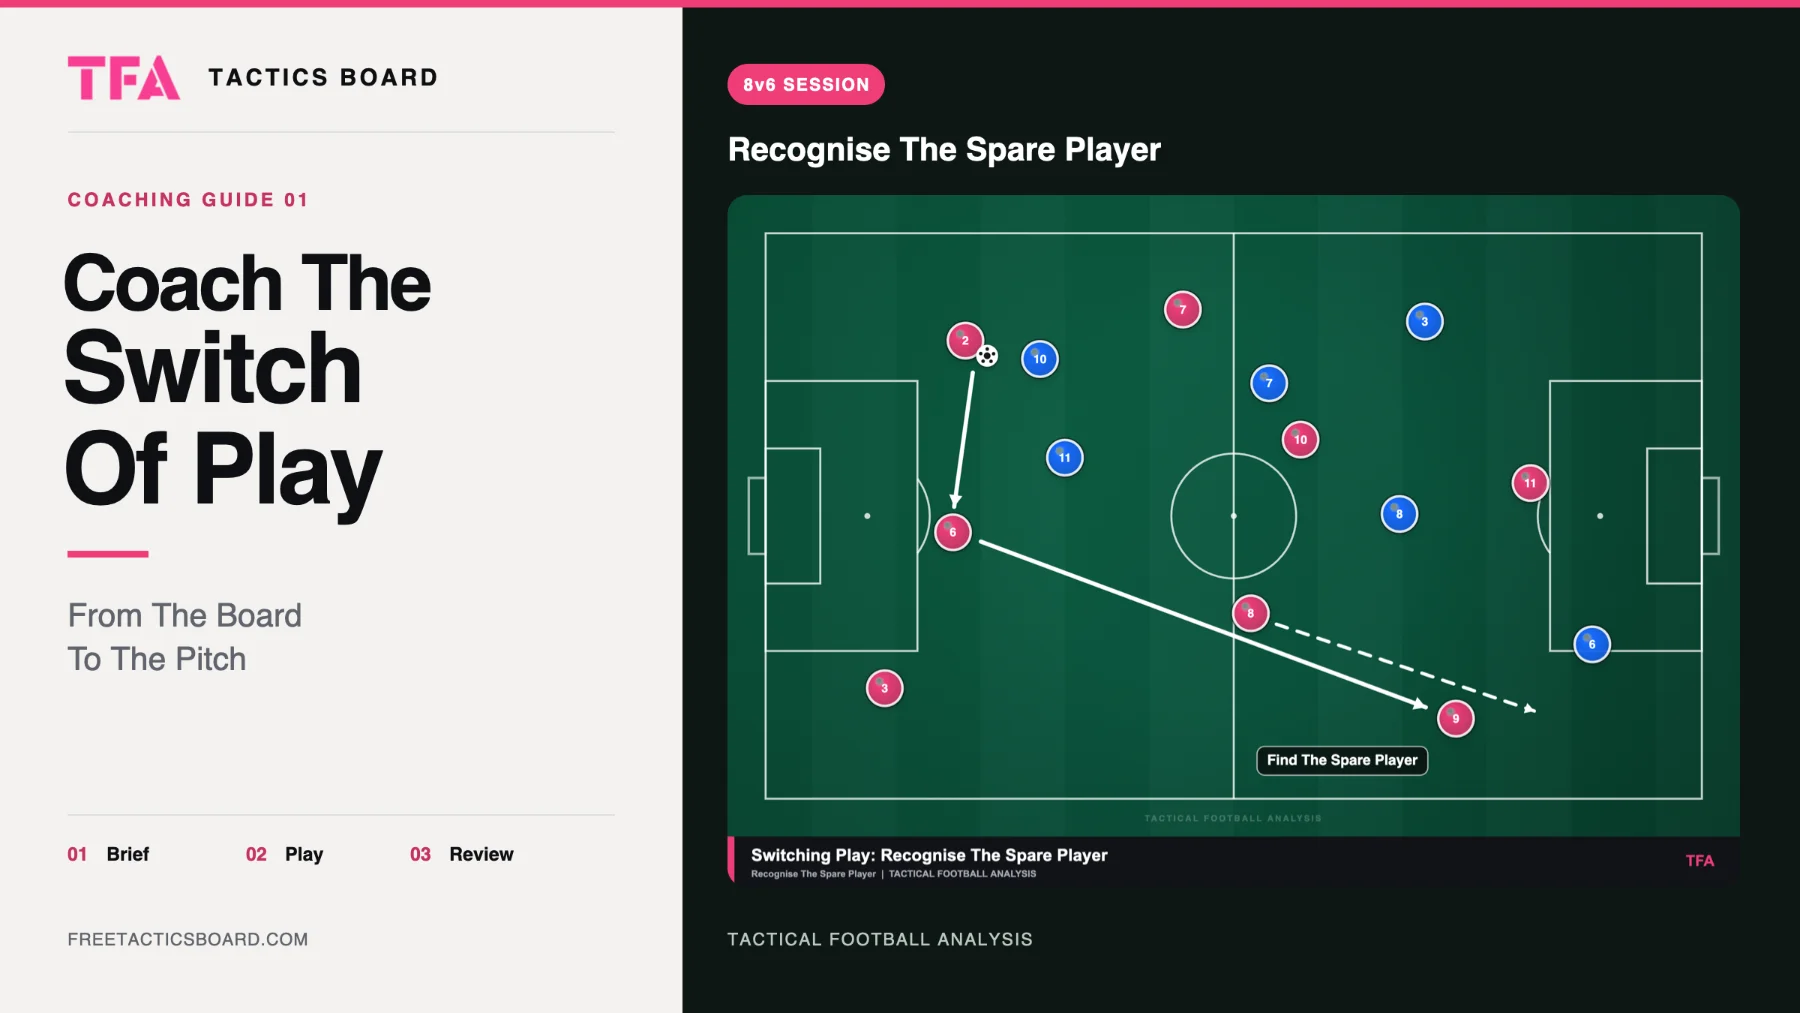
A board covered in twelve arrows causes confusion. Keep each phase to one or two linked movements, then show the next decision separately. The switching-play coaching guide offers a useful application: the attacking advantage depends on drawing pressure before transferring possession, so the diagram needs the trigger and the receiver's angle as well as the pass. Treat each drawn cue as a claim your players can test in rehearsal.
Tips for Boards Other People Can Read
A 2025 youth football communication study surveyed 1,024 parents and 340 coaches and found that parents reported lower communication frequency than coaches across several channels; WhatsApp groups were common but neither group judged them the most effective weekly method. Sending information and achieving shared understanding aren't the same thing.
For a coaching board, that distinction matters immediately. An assistant may understand a compactness instruction, while a player sees only crowded symbols and a parent sees unexplained positional jargon.
Make interpretation easy
Limit the visual load. Keep no more than four or five arrows in a frame, and use fewer when explaining an unfamiliar action. Separate alternatives rather than crossing them over the main sequence.
Give colours clear jobs. Use a team colour for each side and a contrasting accent for the ball. Choose a colour-safe palette and retain numbers or labels so identification never relies on colour alone.
Explain roles beside numbers. Add striker, holding midfielder or half-space runner where the responsibility matters. Explain half-space as the channel between the centre and the wing for unfamiliar audiences.
Keep notes brief. Aim for two lines of coaching notes, using verbs such as scan, delay, support or recover. Longer explanations belong in the briefing, not over the passing lane.
Check the phone view. Open the exported image at normal phone size. Enlarge labels or remove detail if reading requires repeated zooming.
Ask for interpretation. Have a player describe the starting position, trigger and response without a coach supplying missing information. A correct nod isn't evidence of understanding.
Export for the audience
Prepare a player version showing roles and triggers, a coach version containing constraints and progressions, and a plain-language version for parents or new educators. These should explain the same plan at different depths, not introduce competing instructions.
Keep a PNG copy of each version intended for reuse. Because working storage remains in the current browser, an exported image provides a separate reference, though it isn't an editable project backup.
How to Turn the Board Into a Practice
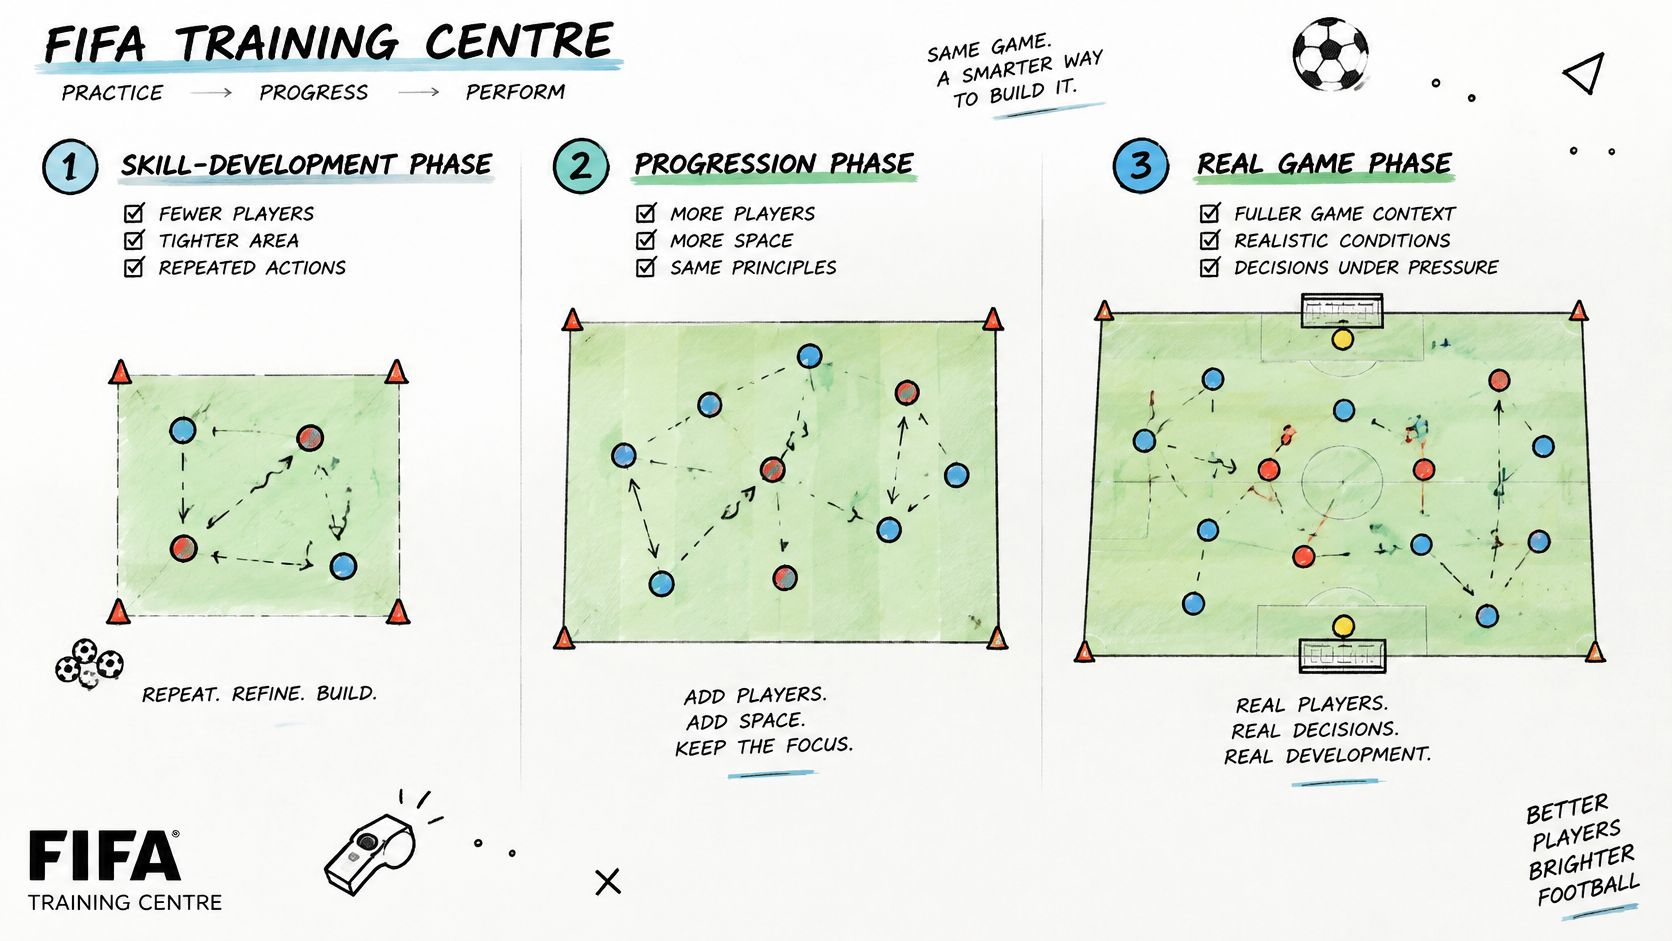
The FIFA Training Centre principles of effective session design describe a three-phase structure: skill development with fewer players, tighter space and high repetition; progression with more players, more space and greater decision-making; then a game phase in a larger, realistic area. The progression should change the problem players solve through decisions and pressure. A bigger pitch with the same problem rehearses the same answer.
Example of a zoned build-up practice
A hypothetical 7v7 adaptation, including goalkeepers, can use a 2-3-1 outfield shape and the relationships in FIFA Training Centre's playing-forward-centrally practice: 2v1 in the defensive zone, 3v3 centrally and 1v2 in the attacking zone. Draw the zone boundaries and permitted forward movement before adding any attacking combinations.
The objective is to recognise when a line-breaking pass or carry is available. Players remain in their zone unless they progress the ball into the next zone; only those progressing possession may move forward, so every support run starts with a real decision to advance. An automatic rotation with no trigger breaks the constraint.
For a different build-up problem, FIFA Training Centre's 8v8 plus one practice uses a defending 2-3-2 against a 2-3-3 in possession, with a neutral player creating a central advantage. The board must show the connections that break the first press: the staggered receiving heights, the neutral's position between the lines and the wide options that stretch the block. Draw those before kick-off, because they are the hypothesis the practice is testing.
Two source-based practice examples on one record sheet
Field | Zone practice (2-3-1) | 8v8 plus one build-up |
|---|---|---|
Objective | Recognise when and how to break a line | Build from the back against a high block through width, depth and central connections |
Formation | 2-3-1 with three zones | Defending 2-3-2 against a 2-3-3 in possession with a neutral player |
Player numbers | 2v1 defensive zone, 3v3 central zone, 1v2 attacking zone | 8v8 plus one neutral player |
Setup | Zone boundaries, overloads and permitted forward movement | Reduced field with two goals |
Coaching cues | Receive with the body open; scan before the ball arrives | Stagger receiving heights; offer connections between lines |
Progression | Increase defensive pressure or reduce touches | Allow immediate pressing and reward goals after breaking the first line |
Adaptation for less experienced players | Widen zones or add a neutral player | Lower the press |
Record what the constraint should produce
Treat each practice as a hypothesis: the drawn shape predicts a decision, and the constraint exists to make that decision necessary. The Coaching Blog's session-design guidance provides practical coaching ideas and tactical frameworks for building these problems. Alongside the planning fields in the table, leave room on the sheet for details that only get settled once the session starts:
Ball-entry point. Record where each repetition begins, such as the goalkeeper's distribution or a coach's pass into the pivot, since the entry decides which problem keeps recurring.
Rotation plan. Note when the neutral player swaps teams and when defenders rotate roles, so every outfield player reads the problem from both sides of it.
First stoppage. Log when play first paused and whether the freeze landed on the drawn trigger or chased an unrelated mistake; a stoppage on the cue teaches, while a stoppage on every error just slows the repetition down.
Test the Diagram Before You Share It
Run the board as a short practice with a small group before presenting it to the full squad. The first test is whether players recognise the situation without the coach calling out each movement.
A rehearsal can expose an impossible receiving angle, a run that starts too early or a defender who can cover apparently separate options. Those results should revise the hypothesis before the diagram is copied.
Use a decision checklist
Does the rehearsal produce the intended decision under pressure? Reapply the earlier trigger check, then watch whether the same cue still controls the choice once opponents interfere.
Does the diagram change when an opposition player moves? Reposition the screening midfielder or nearest defender. If the attacking answer never changes, the board may be teaching choreography rather than recognition.
Does observed behaviour match the intended behaviour? Judge the scan and the selected option before judging whether the pass reached its target.
What should change first? Adjust space or player relationships before adding another verbal instruction. Change a major constraint in isolation so the coach can identify its effect.
Measure the decision
Record a small set of observable measures, such as successful penetrative actions or width maintained when the ball travels centrally. Define the observation beforehand: width held might mean the far-side outlet remains available outside the opposition's compact block.
Compare the outcome with the single variable in the board's phase sentence. If pressure-passing efficiency was the target, general praise for energetic play leaves the adjustment untested.
A useful revision explains what changed, why it changed and which player decision should improve.
Keep a before-and-after rehearsal record for each change: constraint altered, observed response, next adjustment. The record should show which version produced the better decision on the pitch.
The final check is interpretability: players should explain their choices, assistants should understand the intervention and other audiences should understand the purpose. Try the free formation board with a single phase and a decision that can be tested.
TFA Tactics Board offers formation setup, movement arrows, coaching notes and PNG export for turning a tactical idea into a usable briefing. Visit TFA Tactics Board to build a starting picture, label the decision and prepare a diagram that can be checked in practice.
Made with Outrank tool