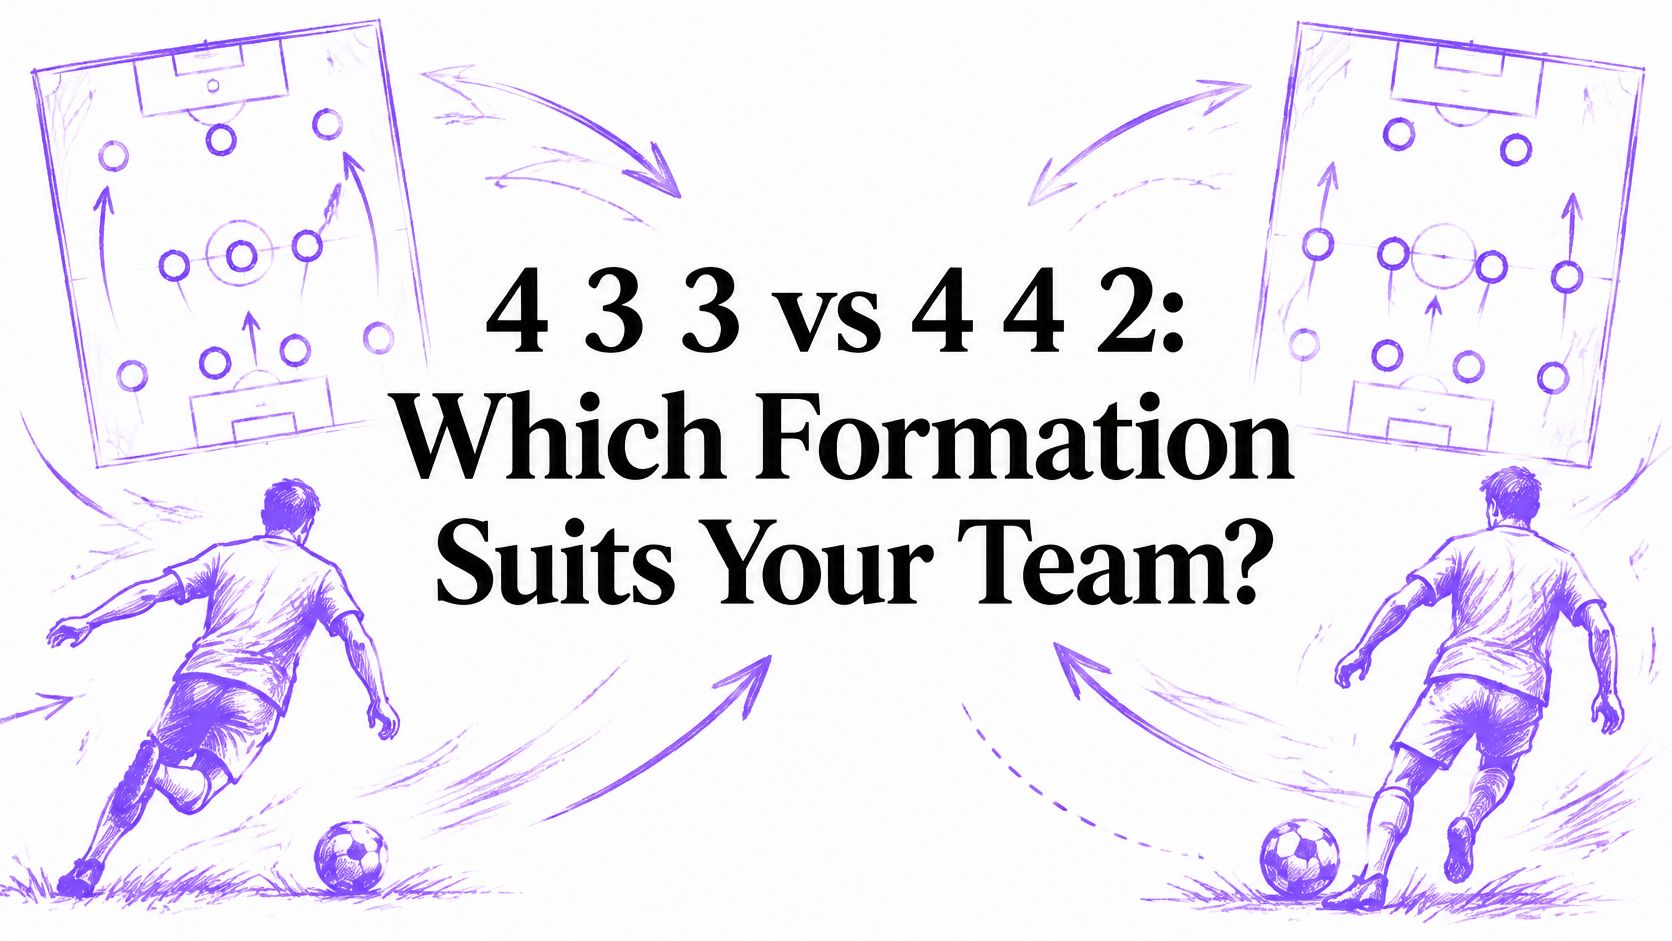
The team looks balanced on the tactics board, but the first wide turnover leaves a defender chasing towards the touchline and midfielders pointing at an empty channel. For a coach weighing up 4-3 vs 3-4, the useful question isn't which diagram looks safer. It's which player supplies width, which player contests the first duel and which teammate covers when that duel is lost.
Table of Contents
4-3-3 and 3-4-3 at a Glance
4-3-3 and 3-4-3 differ less in player count than in who supplies width, protects the centre and recovers after possession is lost. The right choice therefore rests on player roles, the opponent and the squad, rather than a preference for an extra defender or midfielder.
The terminology needs clearing up first. In American football, 4-3 and 3-4 describe defensive fronts, respectively four down linemen with three linebackers and three down linemen with four linebackers, as explained in the NFL's account of defensive evolution. Those labels can't be transferred directly to association football, so the working comparison here is 4-3-3 against 3-4-3.
4-3-3 and 3-4-3 side by side
Area | 4-3-3 | 3-4-3 |
|---|---|---|
Back line | Four defenders: two centre-backs and two full-backs | Three centre-backs |
Midfield | Three: one pivot and two number 8s | Two central midfielders plus two wing-backs |
Front line | Three attackers, usually two wingers and a centre-forward | Three attackers, usually two wide forwards and a centre-forward |
Width source | Wingers on the touchline, supported by full-backs | Wing-backs in the midfield line |
Out-of-possession shape | Back four with midfield three and wide players tracking back | Back five with wing-backs recovering, forming a 5-4-1 when the wide forwards drop |
Central protection | One pivot plus two number 8s | Two central midfielders protecting a wider horizontal space |
Main build-up risk | Single pivot overloaded by a two-forward press | Pinned wing-backs leaving outside centre-backs exposed |
Reading the responsibilities
The back-line row identifies who starts closest to a wide opponent. A full-back can engage from an established wide position; an outside centre-back must judge whether leaving the line exposes the space inside.
The midfield row identifies who protects the next pass. A midfield triangle offers different pressing angles from a central pair, but neither arrangement works if players chase the same opponent.
The width row identifies who must travel when the attack changes direction. A winger holding the touchline and a wing-back arriving from deeper positions may occupy similar attacking spaces, but their recovery responsibilities aren't identical.
For coaches comparing other starting arrangements, the guide to 11v11 football formations provides a broader positional reference. American football defensive statistics aren't evidence for these association-football choices.
Starting principle: Choose the responsibility before choosing the formation label.
Where the Width Comes From
A useful hypothetical example starts with a full-back moving towards the touchline to receive. The winger moves inside, taking an opponent towards the half-space, while the near-side number 8 drops behind the ball to protect the vacated space.
That rotation can work in a 4-3-3, but only if the players recognise each other's movement. If the full-back and winger both stay wide at the same height, the team may lose an inside passing option without gaining a useful advantage outside.
Width in a 4-3-3
The winger normally provides the initial width. The full-back then chooses whether to support underneath, overlap outside or remain deeper to help secure possession.
The coach needs clear answers to the supporting questions:
Opposing winger: When the full-back advances, the nearest midfielder or covering defender must know who controls that opponent.
First duel: The winger should recognise whether to attack the defender immediately or combine with the supporting full-back.
Delivery: The player arriving wide needs a purpose, such as crossing, cutting back or drawing pressure before passing inside.
A suitable full-back needs more than running capacity. Receiving orientation, crossing choices and one-versus-one defending matter because the same player may attack beyond the winger and defend an isolated opponent during the next passage.
Width in a 3-4-3
The wing-back usually provides the outside outlet, allowing the wide forward to occupy a narrower attacking position. The covering arrangement must therefore account for both the outside centre-back and the near-side central midfielder.
If the wing-back is caught high, the outside centre-back may have to delay the counter in the channel. The midfielder must then protect the pass inside rather than following the ball towards the touchline.
The published positional-demand study of players in a 4-3-3 found that central midfielders covered the greatest total distance and distance per minute, while wide defenders and forwards faced the highest sprint and high-speed-running demands. That supports careful preparation for repeated recovery efforts among full-backs and wingers.
Wing-backs also face demanding two-way running along the flank. That's a general tactical observation, not a measured distance comparison established by the cited 4-3-3 study.
The squad assessment should be specific: which player can sustain the role's attacking decisions, crossing quality and recovery defending for ninety minutes, and which player needs a different assignment or planned replacement?
Pressing Triggers and Defensive Shape
A pressing trigger is a pass or action that tells connected players to move together. It isn't permission for the nearest player to sprint while everyone else watches.
In a 4-3-3, the front three guide the opponent's first pass and the midfield three protect the next options. The Coaches' Voice explanation of the 4-3-3 describes the number 8s' choice between supporting pressure wide and preserving central connections, with the deeper midfielder protecting behind them.
The illustration below accompanies the pressing comparison. Coaching diagrams should be checked for player counts, positions and arrow meanings before use with a team.
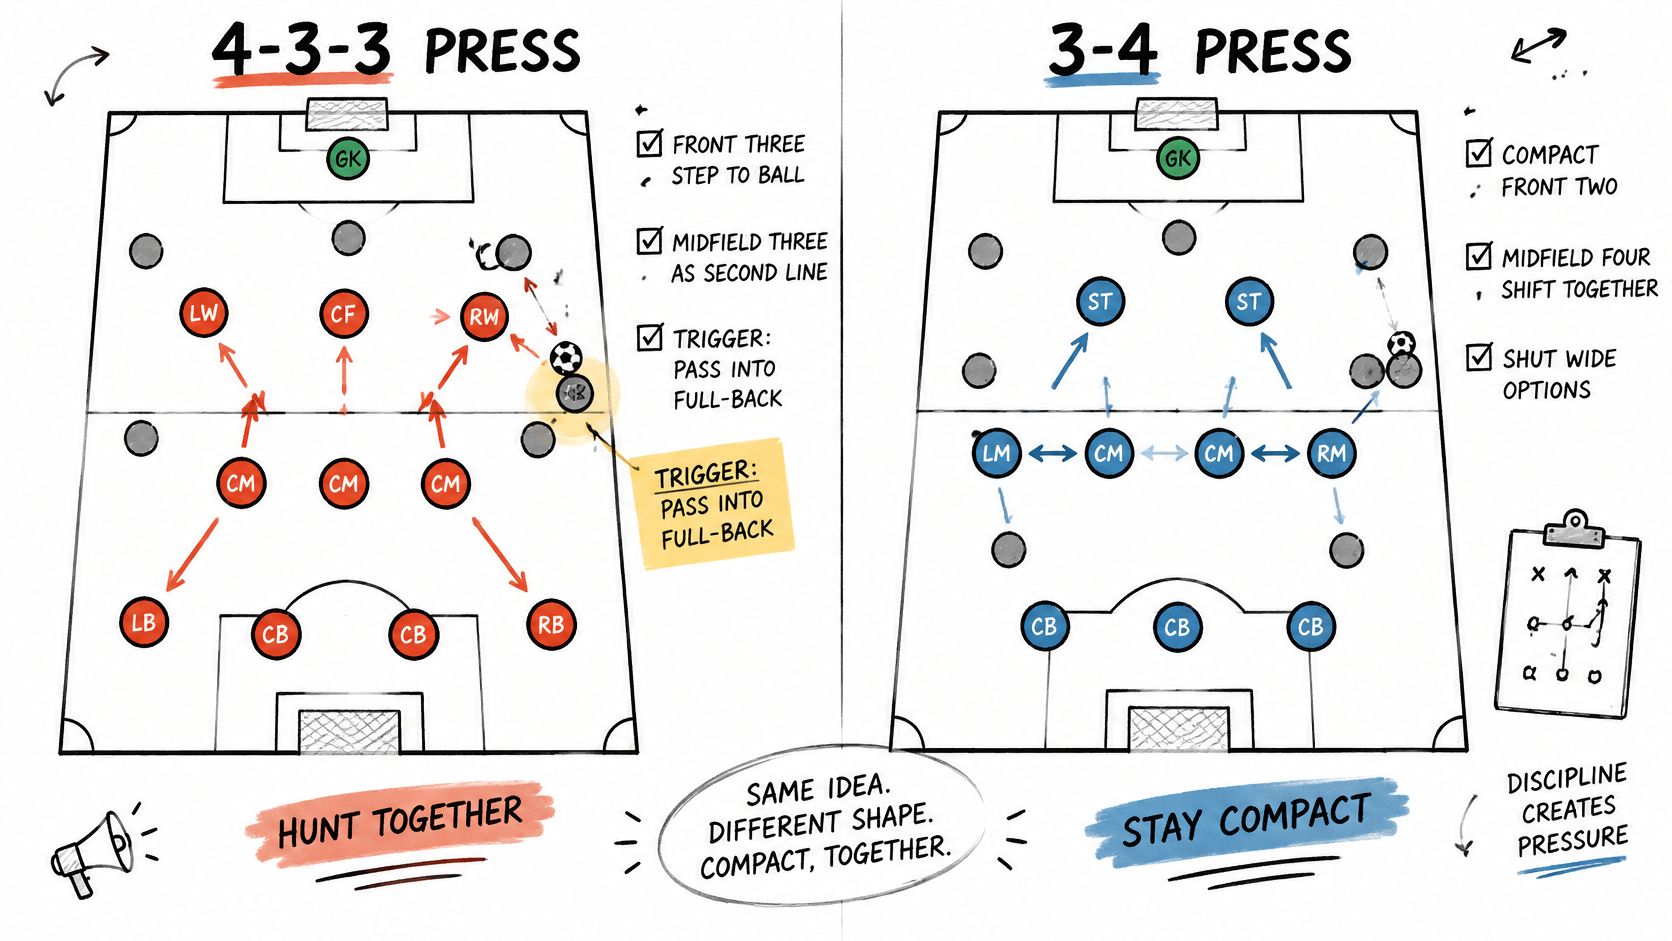
Triggers in a 4-3-3
Pass into the opposition full-back: The nearest winger presses as the ball travels, the near-side number 8 controls the inside option and the pivot screens centrally. An early jump can reveal the inside pass before support arrives.
Pass into a wide centre-back: The winger curves the approach to discourage progression outside while the striker controls access across the back line. A straight approach can leave both routes available.
Pass back to the goalkeeper: The striker advances with an agreed passing lane screened, while the wingers prepare to engage the next receiver. If midfield doesn't advance, the opponent can play beyond the front line into an unprotected gap.
Triggers in a 3-4-3
The front three can engage the centre-backs while the striker's body position guides the available pass. The wing-back's decision is conditional: step only when the channel behind is covered.
Pass into the opposition full-back: The wing-back presses if the outside centre-back can cover behind. Arriving late can leave the wing-back facing the receiver and an overlapping runner.
Pass into a wide centre-back: The near-side forward presses, with the wing-back positioned to engage the outside outlet. If both jump towards the same player, the next wide pass escapes them.
Pass back to the goalkeeper: The front three move together and the central pair protect access into midfield. An isolated striker press invites the goalkeeper to find a free defender.
The correct response can be to delay. A connected block is more useful than a pressing run that exposes an undefended channel.
Press height should reflect the opponent's receiving quality and ability to play behind. Against a goalkeeper comfortable passing through pressure, a coach can begin deeper and trigger on a less secure receiver.
For board preparation, paid members can switch the pitch view to the defensive half, middle third or attacking half. Those focused views aren't part of the free core board.
Build-up and Midfield Control
A 4-3-3 doesn't have to build with a flat back four. The pivot can drop between the centre-backs, allowing them to separate and giving the goalkeeper another short connection.
That movement changes the midfield picture. If the pivot drops without another player offering centrally, the team gains a defender on the first line but loses an accessible receiver beyond the press.
Building from a midfield triangle
In a hypothetical 4-3-3 build-up, the centre-backs split and the pivot initially stays ahead of them. Against opposing forwards screening that pivot, the nearest number 8 can drop diagonally rather than standing directly behind an opponent.
The decision for each number 8 is whether to receive between the lines or support the route into those spaces. Both moving high can isolate the pivot; both dropping can leave the centre-forward disconnected.
Useful observations include:
Passing distance: The pivot must remain close enough to the nearest centre-back for a controllable pass and a supporting return.
Body orientation: A midfielder receiving side-on can see pressure and the next option earlier than one facing only the passer.
Shared movement: When the ball moves across the defence, the midfield should adjust together rather than arriving as separate individuals.
The guide to 11-a-side football positions and responsibilities helps distinguish a player's starting position from the task required during that movement.
Building from a central pair
In a 3-4-3, the central midfielders must offer passing options without abandoning protection of the centre. Standing level and close together can make both easy to screen with the same pressing line.
Consider a hypothetical build-up through the right wing-back. The near-side midfielder drops alongside the defensive line to create a temporary back four, while the far-side wing-back stays wide and the other central midfielder preserves an inside connection.
That rotation isn't automatically safer. The dropping player must remain available, and the ball carrier must still have a route forward rather than being forced down the touchline.
The same midfielders also need to account for the opposition striker and attacking midfielders if possession breaks down. A useful receiving position therefore serves both the next pass and the next defensive action.
Rehearsal should alternate between receiving on the half-turn between lines and recognising when pressure makes the free wide player the better option. The aim isn't to force every attack through midfield, but to make the opponent defend both routes.
Transitions When the Ball Changes Hands
How many players are behind the ball? On every turnover, that question matters more than whether the starting formation included an extra centre-back.
A back three doesn't guarantee security if the players outside it are high and the midfield screen has disappeared. Equally, a back four can control a counter if the nearest players delay effectively and the covering players protect the most dangerous route.
After losing possession
In a 4-3-3, the nearest winger and full-back should distinguish between pressuring the ball and protecting the space behind. If both attack the ball carrier, an opponent can release a runner into the vacated channel.
The midfield three then shuffle towards the loss while preserving central cover. The immediate task is to make the opponent's first forward action difficult, not to restore a perfect starting diagram.
In a 3-4-3, the recovery can produce a back five, with wide forwards dropping towards a 5-4-1, as outlined in the 3-4-3 formation guide. The near wing-back's route should support the outside centre-back, while the far wing-back narrows to account for a switch or far-post run.
The exposed channel remains the priority. A wing-back who cannot affect the ball should recover towards that danger rather than chase from behind.
After regaining possession
A regained ball doesn't always require immediate forward acceleration. The first receiver needs a usable pass, not the most advanced pass available.
4-3-3 release: A winger can run inside to draw a defender away from the flank. A number 8 acting as a number 10 can then receive in the opened pocket, provided the pivot retains cover underneath.
3-4-3 release: A wing-back winning possession can carry forward if the front three have stretched the opposition and the central players secure the space behind.
Recovery-first condition: If the ball winner is facing pressure and teammates remain ahead of the ball, a supporting pass allows the team to reconnect.
Counter-first condition: If the ball winner faces forward, a clear outlet exists and cover remains behind, the team can attack before completing its positional reset.
Turnover rule: The first decision should protect the team from the next lost ball as well as exploit the current regain.
For the 4-3-3, counterattacking before recovery is sensible when the winger has an advantage and the pivot can secure the centre. For the 3-4-3, recovery takes priority when the wing-backs are stranded beyond the ball and the outside defenders are already stretched.
What the Usage Data Can and Cannot Show
The Premier League's published formation figures record 172 uses of 4-3-3 and 71 uses of 3-4-2-1 in the 2023/24 season. The second number needs care, because 3-4-2-1 is not a count of 3-4-3 and cannot stand in for the back-three shape this comparison covers.
A 2026 study in BMC Sports Science, Medicine and Rehabilitation reports that teams using 3-4-3 averaged 1.81 points per match across six European leagues during 2023-2024. That is an association within the study's sample, so it cannot tell you that switching formation would produce the same return for another squad.
Reading formation evidence carefully
Usage shows what clubs fielded, not what worked. Team quality, opponent strength and selection decisions all feed into formation averages, and a coach may pick a shape because of the players available or the match situation rather than any belief in the system itself.
Applied to your own planning, the cautions run in sequence. A frequently used shape may be familiar to the clubs fielding it. Players regularly build, press and recover in arrangements that look nothing like the starting diagram, so a label such as 4-3-3 hides more than it reveals about roles. An average drawn from other squads still has to be tested against yours on the pitch. Before applying any finding, check which phase was measured and how the formations were identified: the formation-analysis publication in the Journal of Sports Analytics treats structure as more than a fixed starting diagram for exactly this reason.
American football defensive statistics are excluded from this comparison. The practical choice stays grounded in roles, opponent behaviour and the squad's ability to execute them.
How to Coach the Shape Switch in 11v11
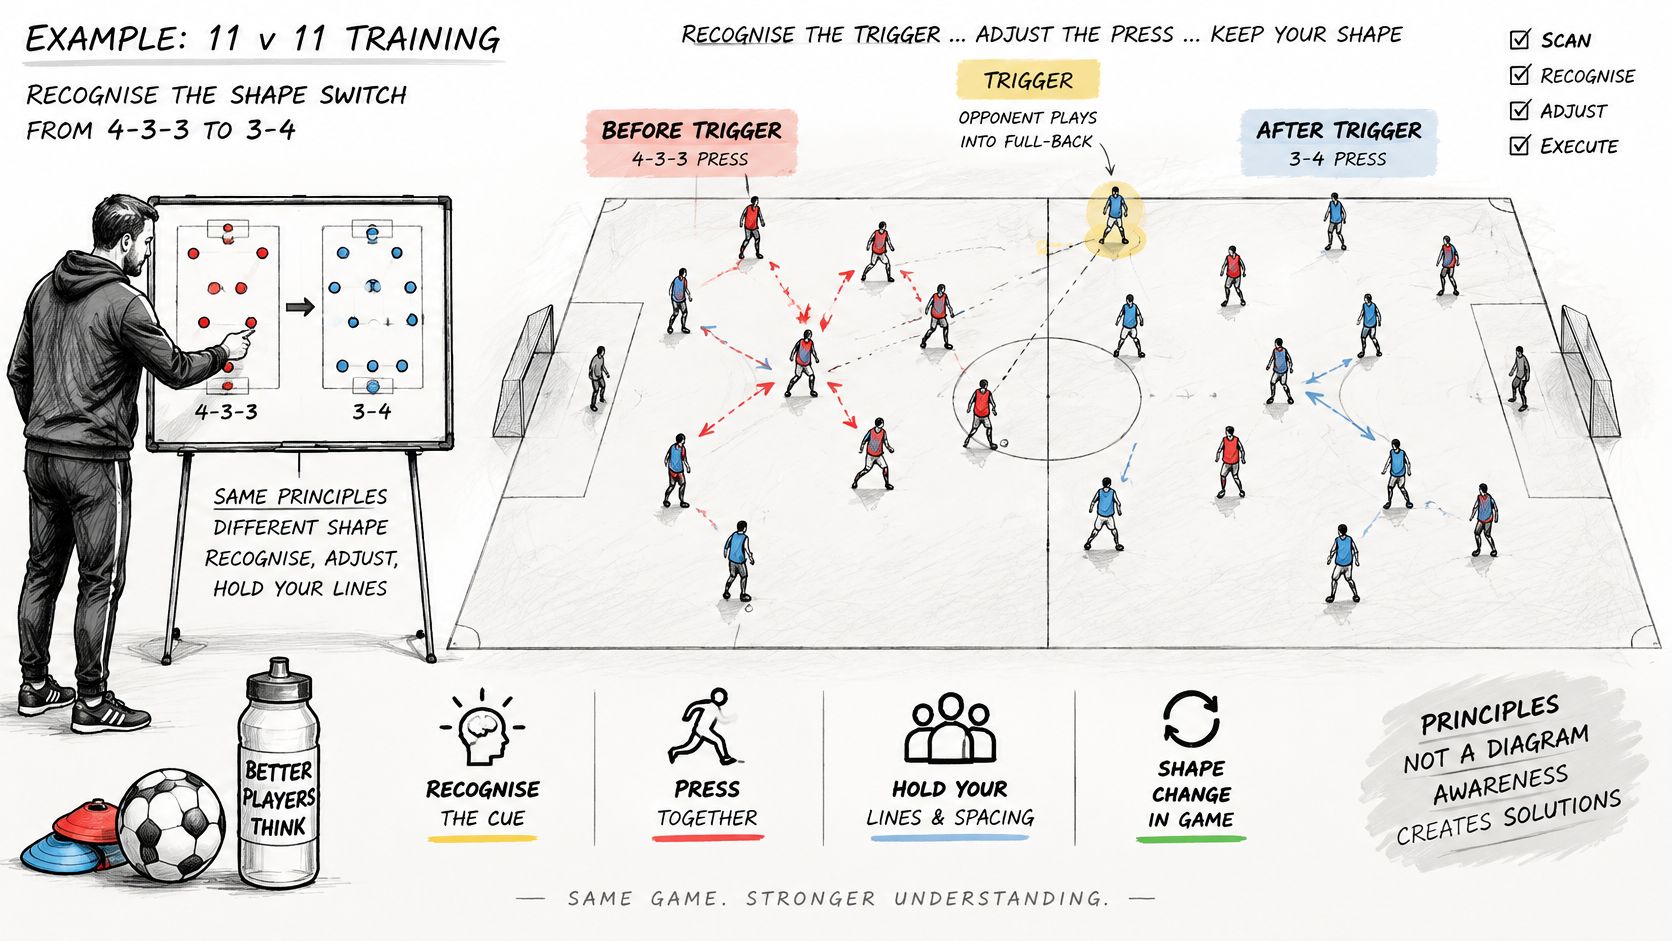
This session teaches a team to recognise a wide pressing trigger, answer the first duel after a turnover and rehearse the role changes between 4-3-3 and 3-4-3. The shape switch is a learning constraint that helps players recognise who presses, who covers, who delays and who becomes the next outlet.
Objective and setup
Use 11 players against 11, including goalkeepers, on half a pitch. The focal team starts in 4-3-3, while the opposition builds in 4-4-2; mark the half-spaces with four cones as reference gates for passes and runs.
Assign the focal team's numbers consistently:
Goalkeeper: 1.
Back four: 2 and 3 as full-backs, with 4 and 5 as centre-backs.
Midfield: 6 as pivot, with 8 and 10 as the number 8s.
Front three: 7 and 11 as wingers, with 9 at centre-forward.
Start each repetition from the opposition goalkeeper. Agree the attacking direction clearly, and place spare balls outside the playing area so restarts keep the teaching moving. The numbers matter less than the jobs attached to them: width comes from 2, 3, 7 and 11 in the starting shape, then from 2 and 3 as wing-backs after the switch.
Use the illustration as a visual prompt while you build the checked session diagram.
Practice sequence
Create the trigger. The opposition passes into a full-back. The nearest winger presses during the pass, while the near-side number 8 controls the inside route and 6 protects the centre.
Let the focal team regain possession and attack. The coach watches whether the midfield supports the ball while still protecting the next turnover.
Call the loss. When the focal team loses possession, use a three-second recovery cue for this group. The nearest player delays the opponent while teammates secure the immediate danger, then the switch can be completed.
Move 2 and 3 into wing-back positions and drop 6 between 4 and 5. Numbers 8 and 10 form the central pair, while 7, 9 and 11 become the front three of the 3-4-3 reference shape.
Pause when the role change is unclear. Check whether 6 can drop without abandoning an immediate receiver and whether 2 or 3 needs to recover deeper before adopting the wing-back position.
Treat the three-second count as a rehearsal tool. Extend it while players are learning the movement, then shorten stoppages once recognition improves and the first delaying action becomes automatic.
Cues, progression and adaptations
Use concise cues: step as the pass travels, cover inside, and call the switch on loss. Reward correct recognition and connected movement, because arriving at a marked cone means little if the first duel is already lost.
Progress by allowing the opposition to play through the cone gates after the switch. Reward the central midfielders when they arrive compactly and prevent an immediate forward connection.
For younger or less experienced players, begin with passive pressure and restrict counters to two channels. For advanced players, add a neutral player linking midfield and attack, making it an 11v11-plus-neutral progression.
Prepare the practice on TFA Tactics Board (Free Tactics Board), by Tactical Football Analysis. Use the free board to choose the 4-3-3 starting shape, map the press and the switch, add numbers and coaching notes, then export a PNG for the session plan. Its free formation library includes 4-3-3, 4-2-3-1, 3-2-5, 4-4-2, 3-4-3 and 5-4-1; manual positioning, the ball, pass and run arrows, labels, numbers, team colours, coaching notes and PNG export support the initial plan without a software download. The 11v11 full-size pitch format is free.
Check every player number, position and arrow meaning before publication. Board storage stays local to the current browser, so export the PNG you want to carry into the session or share with staff.
Choose the Shape Your Next Session Needs
The numbers tell a coach where ten outfield players start. They say less about the jobs underneath: who provides the width, who wins the first duel, and who recovers when possession is lost. That comparison is what should drive the choice for the next session.
Choosing between 4-3-3 and 3-4-3 by situation
Situation | Lean towards | Reason | Watch for |
|---|---|---|---|
Opponent with two wide forwards attacking full-backs | 3-4-3 | Three centre-backs cover wide channels | Wing-backs recovering late |
Opponent building through wide number 8s | 4-3-3 | Pivot and two number 8s match the midfield battle | Pivot overloaded by two forwards |
Squad with two athletic full-backs and few wing-backs | 4-3-3 | Full-backs deliver width without new roles | Isolated full-back in one-versus-one duels |
Squad with two strong wing-backs and limited full-backs | 3-4-3 | Wing-backs provide width in attack and recovery | Outside centre-backs exposed when wing-backs are pinned |
Opponent pressing with two forwards and a number 10 | Either, with trade-offs | Choose according to whether the pivot or wing-backs can receive | Losing the central lane or the flank |
Youth team learning positional roles | 4-3-3 | Fewer roles to learn in the first phase | Wide players tracking back too late |
Test the leaning
Each row is a starting judgement for the coach to test. Pick the situation that matches the next opponent, then watch the team's first turnover of the session: who delays, who covers, and who remains available for the next pass? The answers either confirm the leaning or expose the role that needs changing.
Keep the shape: Players recognise their responsibilities without repeated intervention.
Change the assignment: One role repeatedly exceeds a player's receiving, defending or recovery capacity.
Change the structure: Several players cannot connect their actions despite clear cues and suitable practice conditions.
The £9 membership adds multiple saved boards, advanced drawing and equipment, small-sided pitches, portrait mode and complete colour control. It earns its place when the plan calls for a developing sequence across phases, zones and focus areas on the diagram, or a shared link players can open and play through.
TFA Tactics Board offers browser-based formation setup, manual player positioning, pass and run arrows, coaching notes and PNG export for comparing these roles. Coaches can visit TFA Tactics Board and try the free board to map the chosen shape, mark the first turnover and give each player a clear recovery responsibility.