How does an attacking shape create width and overloads, and who pays the defensive price when possession is lost? A formation diagram rarely answers that question on its own. A team can fill the forward line yet leave the ball carrier without a useful passing angle.
The strongest attacking formations in soccer connect width, central support and defensive cover. A winger might stretch the opposition while a midfielder creates the spare player inside. Elsewhere, a wing-back supplies the width, leaving a centre-back responsible for defending the channel behind.
These eight shapes offer different ways to organise those relationships. Each needs a clear answer to where the width comes from, who creates the overload and which movement protects the next phase. The useful coaching detail sits in the timing, not in the starting positions.
Planning principle: An overload only helps when the spare player can receive or release someone else. Extra bodies around the ball aren't enough.
A tactics board should therefore show the opponent, the intended passing lane and the player covering behind the attack. Training should then let defenders change the picture. Players need to recognise when to combine, when to switch play and when a forward run would leave the team exposed.
Table of Contents
1. 4-3-3
The wingers provide the starting width; the nearest central midfielder usually creates the overload. The striker occupies the centre-backs, while the holding midfielder supports circulation beneath the attack.
The essential relationship is between winger, full-back, and midfielder. If the winger stays wide, the midfielder can receive inside and the full-back can support underneath. If the winger moves infield, someone must replace that width, but the full-back shouldn't advance automatically before cover is established.
This illustration can introduce the starting relationships, rather than prescribe a fixed passing sequence.
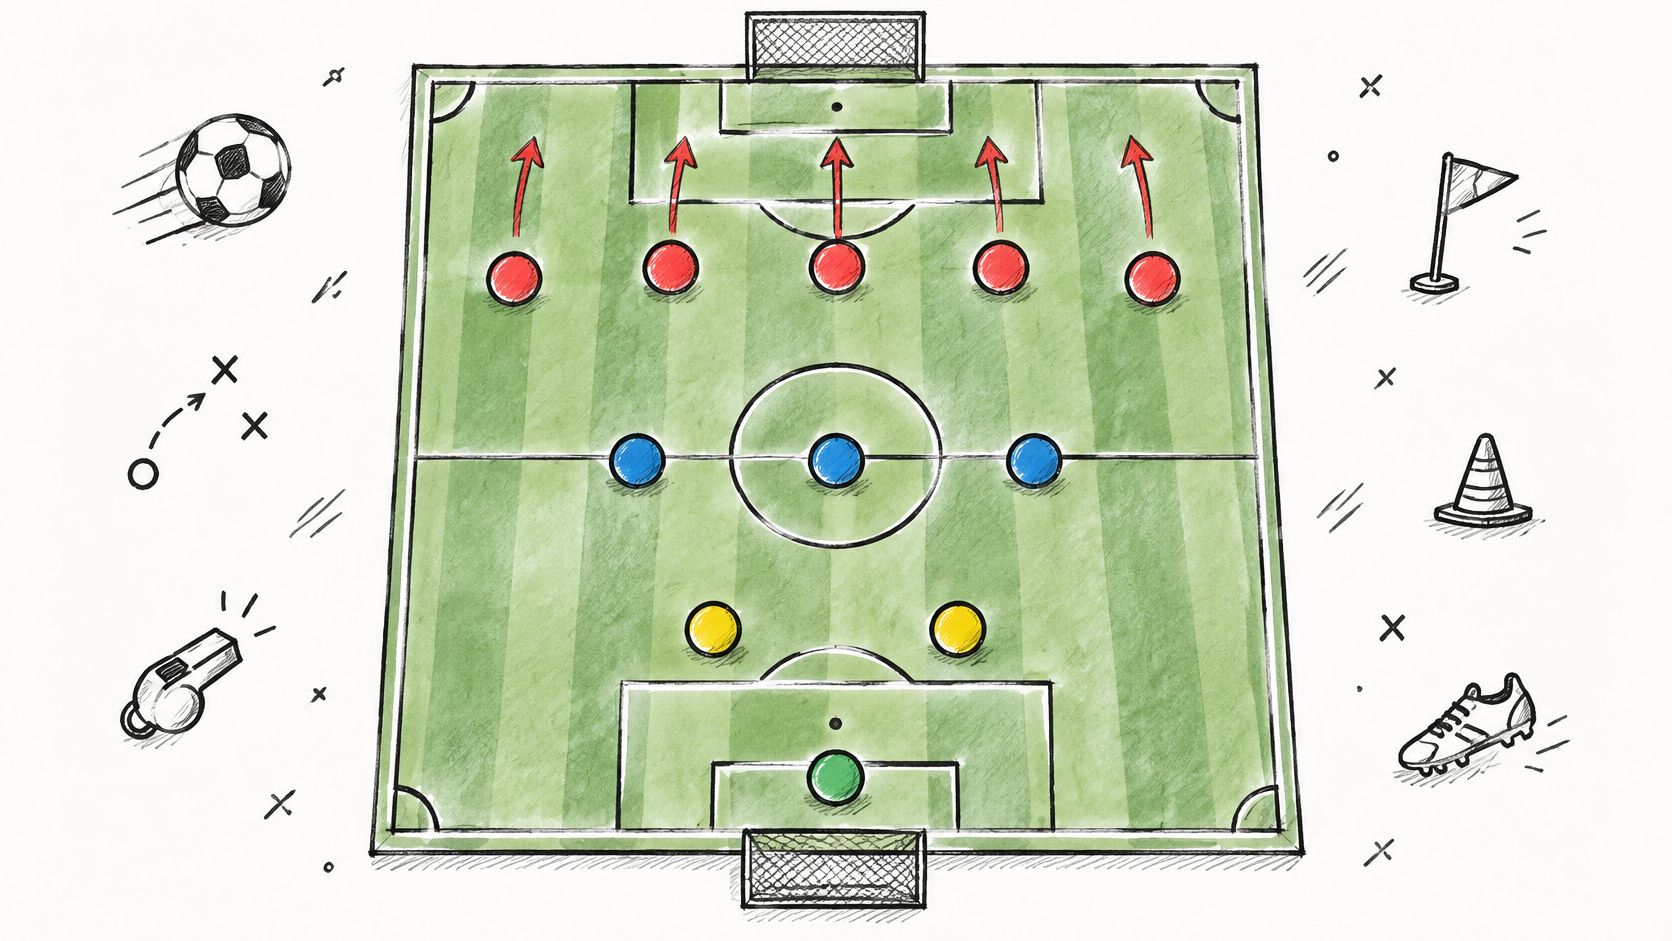
Board setup and training progression
Place the winger high and wide, the nearest midfielder inside and the full-back underneath. Label the pivot cover behind the ball, then add alternative arrows for an overlap and an inside combination. The guide to 11-a-side football formations provides a useful starting reference for comparing the wider team structure.
Example practice: A winger, full-back and midfielder attack against a defending full-back and midfielder, with a striker available centrally. The objective is to release a player facing forward, rather than complete a compulsory overlap.
Coach the cue: Fix the nearest defender before releasing the spare player.
Progress the practice: Add a recovering defender and a counter-attacking outlet.
Adapt the difficulty: Begin with passive pressure for less experienced players; allow defenders to press freely as recognition improves.
A false nine can create another central option, but a winger must threaten behind when the striker drops. Otherwise, the whole front line comes towards the ball.
2. 4-2-3-1
When an opposition midfielder can screen the pass without moving, the number 10 needs a different angle.
Width normally comes from the wide attackers, while the number 10 and a moving pivot create the central overload. A full-back can supply the outside lane when a winger comes inside, provided the nearer pivot protects that side and the far winger holds width.
The illustration offers a starting point for discussing those movements.
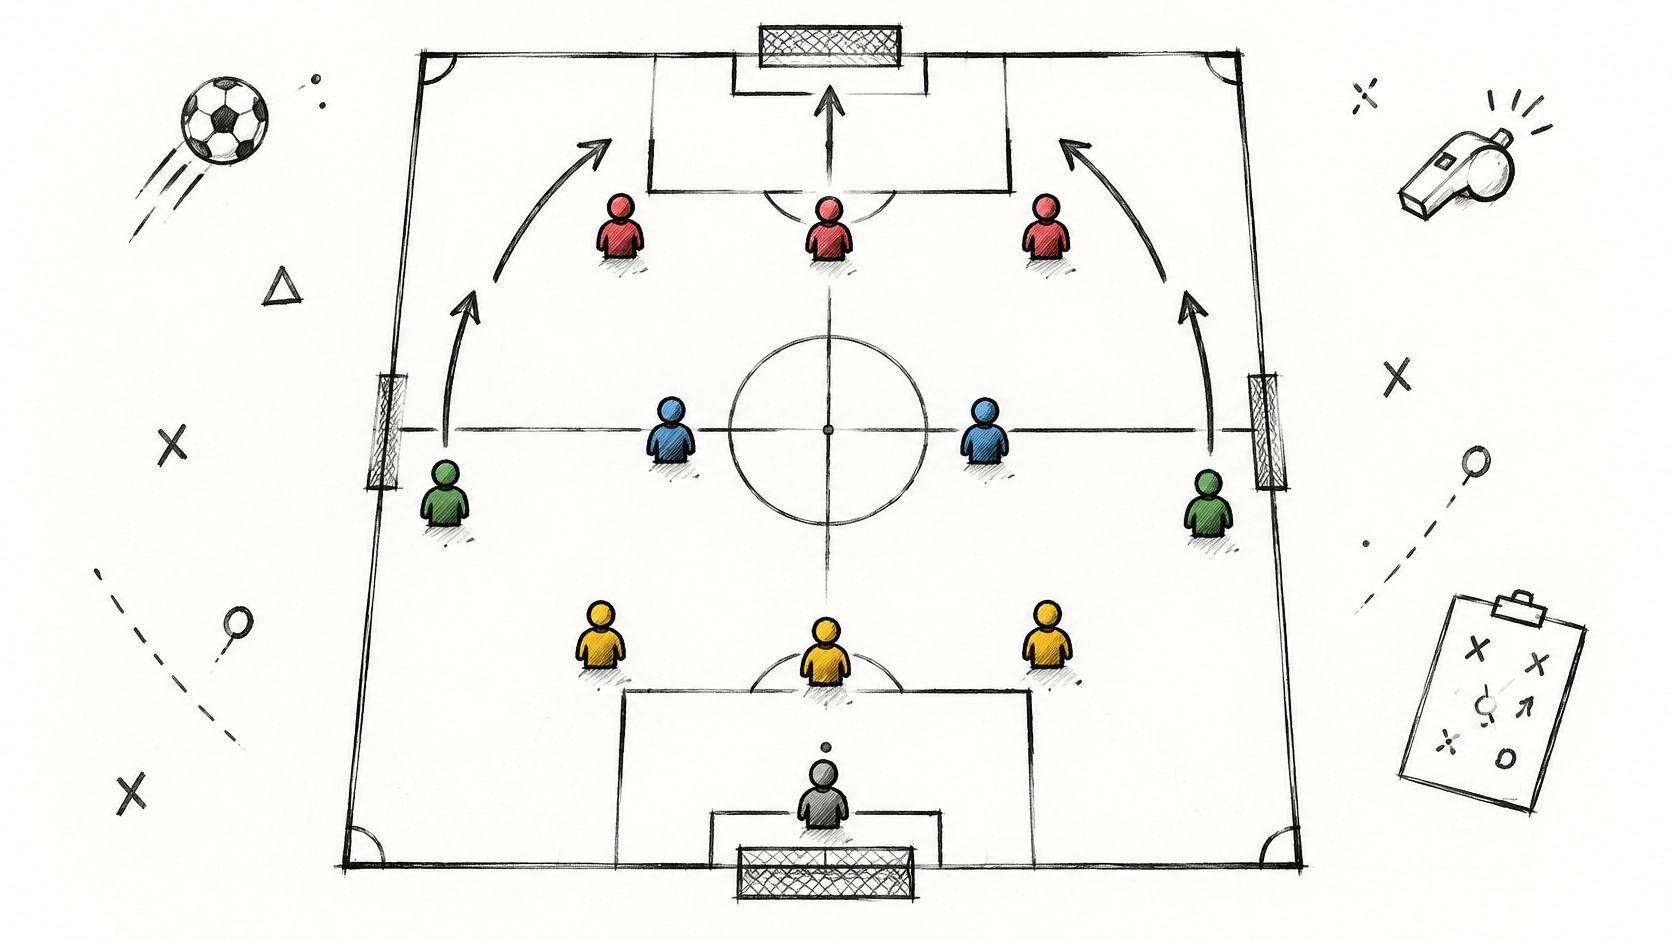
Make the number 10 accessible
On the board, position the pivots at different heights. Put the number 10 beyond an opposition midfielder's shoulder and show a pass into the striker, followed by a lay-off into the attacking midfielder's path. Add a second arrow for the weak-side winger staying high so the defence cannot fold in.
Assess the shape through in-possession relationships rather than treating the starting label as a complete description; the study of dynamic tactical subgroups makes the same case for tracking how players regroup once the ball moves.
Example practice: Use the double pivot and number 10 against a defending midfield pair, with wide support players and a striker as outlets. Award success for finding the number 10 facing forward or using that player's movement to release another attacker.
Begin with the outside players unopposed, then allow defenders to press them. For stronger groups, add an immediate counter towards a target behind the pivots. Coach receive beyond the cover shadow, support underneath and keep the striker connected.
Both pivots chasing the same forward pass removes the security that makes this shape useful.
3. 3-4-3
The wing-backs supply width, allowing the wide forwards to occupy narrower positions. The overload can come from a forward dropping towards midfield or an outside centre-back carrying beyond the first pressing line.
The decision is whether the wing-back should advance or remain available underneath. Pushing high before the team controls possession can strand the ball carrier and expose the outside centre-back.
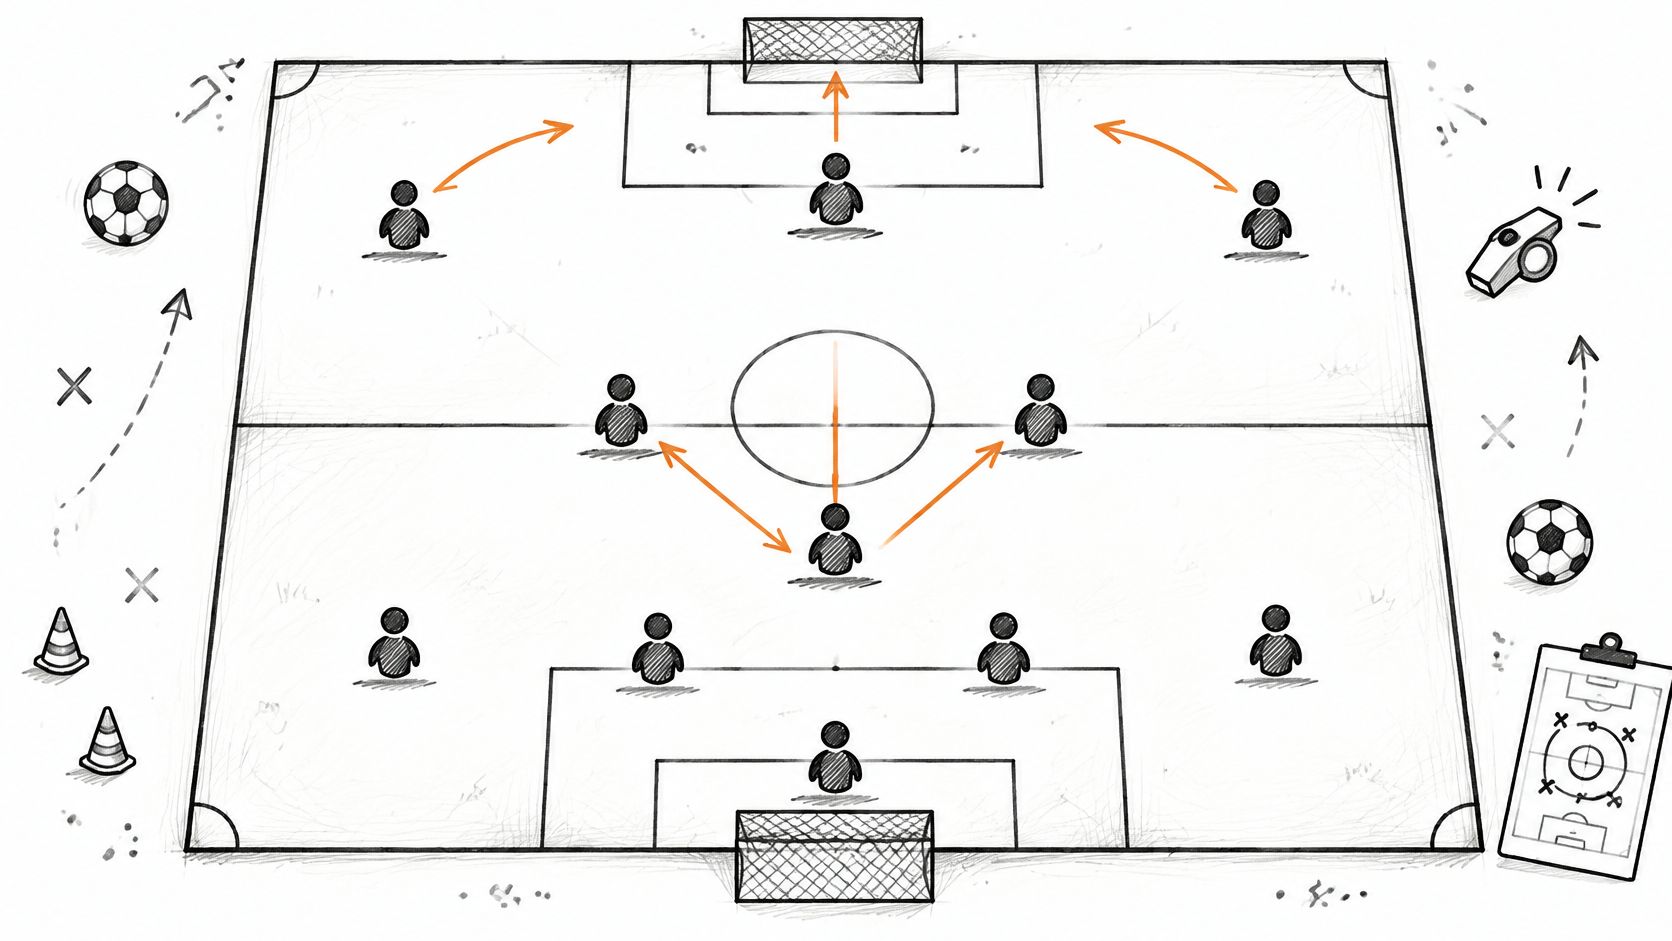
Use the illustration to discuss the space behind the advancing wide player.
Connect the wing-back and inside forward
Set the outside centre-back behind the wing-back, with the inside forward between the opposition full-back and centre-back. Add a run arrow for the wing-back and label the channel that needs covering if the centre-back steps forward.
Example practice: An outside centre-back, wing-back, central midfielder and inside forward attack against a wide defensive unit. The objective is to release either the wing-back outside or the forward inside, depending on which lane the defender protects.
Start with a numerical advantage, then add a recovering opponent. Less experienced players can retain a free supporting player behind the attack; advanced groups should face a live counter into the vacated channel.
The wing-back's forward run needs a covering movement behind it. Those actions belong in the same coaching picture.
Small-sided-game evidence associates numerical superiority with greater attacking breadth, depth and supporting actions in the systematic review of technical-tactical behaviour. Coach the spare player to expand the attack, rather than crowd the receiver.
4. 3-5-2
Two strikers create a useful dilemma when one comes short and the other threatens behind. If both demand the ball to feet, defenders can step forward without having to protect depth.
Width comes from the wing-backs. The midfield trio creates central support, with the nearest shuttler joining the striker's lay-off and the holding midfielder remaining available to recycle possession.
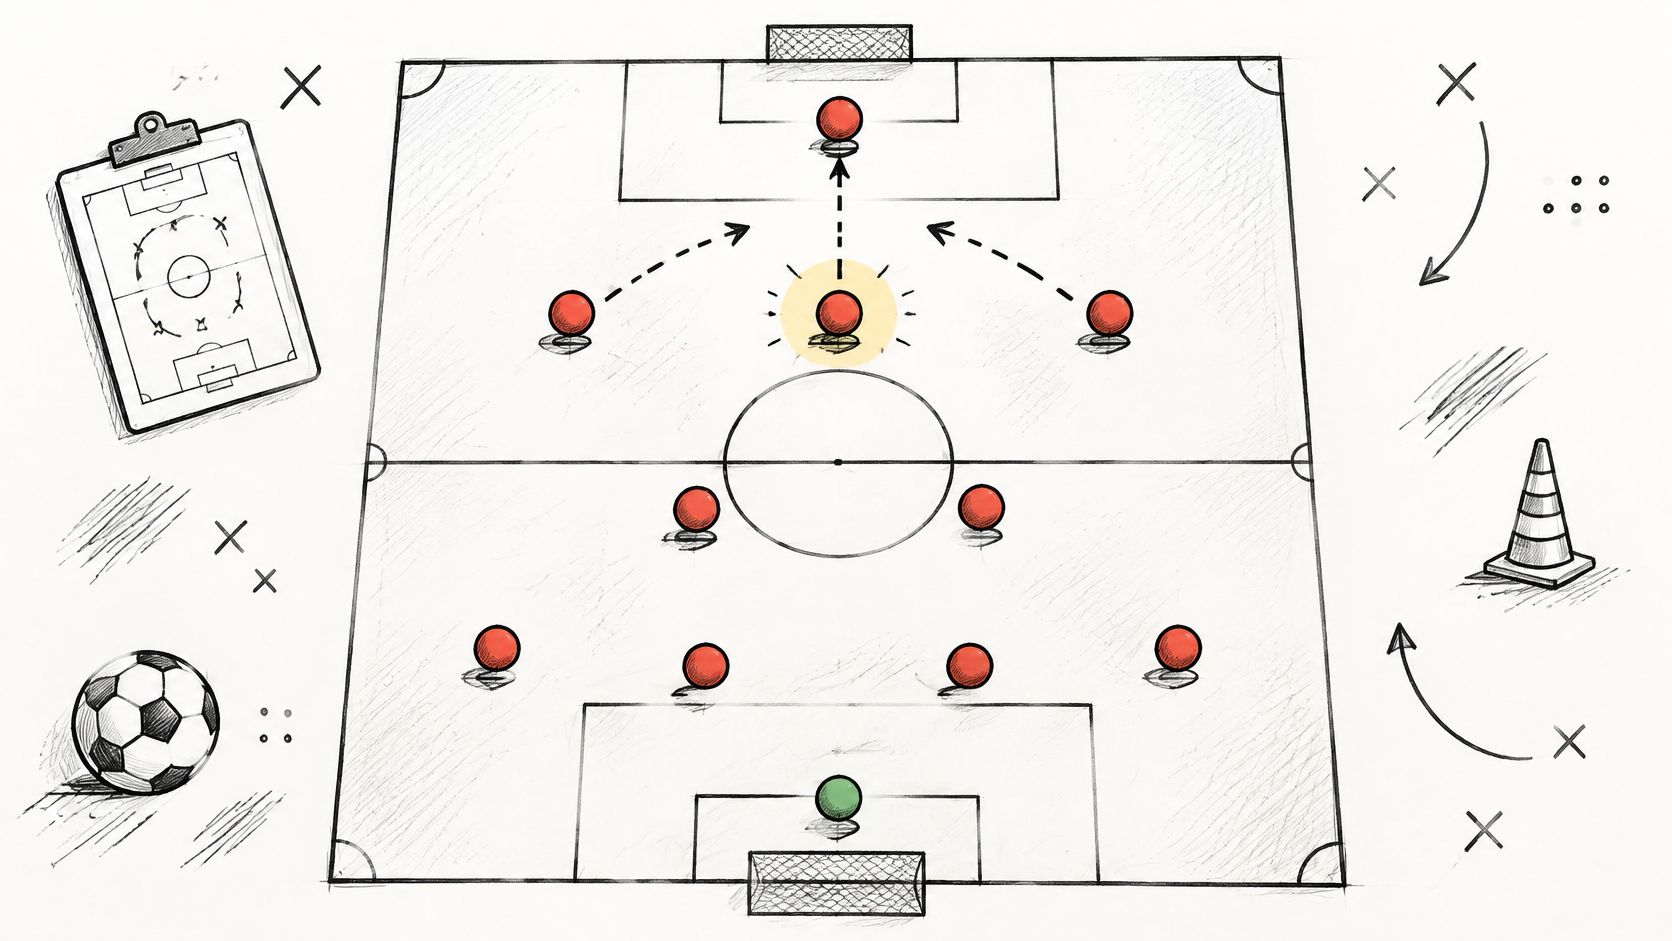
The illustration can help distinguish forward movement from the covering positions.
Rehearse the striker partnership
Label the midfield roles on the board: holding player, near-side support and far-side balance. Show a pass into the dropping striker, a supporting midfielder's movement and the second striker's run beyond.
Example practice: The midfield trio and striker pair attack a central defensive unit, with wing-backs available as outside outlets. The objective is to create a shot through a central combination or release a wing-back when defenders narrow.
Initial task: Allow the supporting midfielder time to receive the striker's lay-off.
Progression: Let a defender follow the dropping striker, making the space behind available.
Ability adaptation: Add an attacking support player for developing groups; introduce recovery pressure for stronger players.
Coach different heights, one short, one beyond and arrive rather than wait. On a regain, the strikers should first assess whether a direct pass is available.
Physical preparation also matters. A professional-team analysis published in 2024 found more high-intensity efforts in a 3-5-2 than a 4-3-3 within the team studied. That isn't a universal ranking, but it cautions against choosing wing-back roles without considering their demands.
5. 4-4-2
The 4-4-2 offers clear attacking reference points: wide midfielders stretch the pitch, full-backs support and the strikers occupy the central defenders. Its limitation appears when the central midfield pair becomes outnumbered and neither forward offers a passing connection.
The overload usually needs a movement, not another permanent central position. A striker dropping beneath the defensive line can help the midfield pair, while the other forward preserves depth.
In a controlled comparison, successful-pass proportion was highest in the 4-4-2, while attackers in the 4-3-3 performed approximately 30% more high-intensity running than attackers in the other systems tested, according to the formation comparison study. That finding describes the tested conditions, not a guarantee of easier possession.
Turn crossing practice into a decision
On the board, position the wide midfielder near the touchline and the full-back behind. Show a striker offering towards the ball, the partner staying central and the far-side midfielder arriving towards the back post.
Example practice: A wide midfielder and full-back combine against an opposing wide pair, with the striker partnership attacking the penalty area against centre-backs. The objective is to create an appropriate delivery, not cross regardless of pressure.
Begin with an overload outside, then introduce equal numbers. Less experienced groups can receive unopposed before pressure arrives; advanced groups should defend and counter immediately after a clearance.
Coach separate the strikers, look before delivering and cover the cleared ball. If both central midfielders attack the box, a blocked cross can leave the centre-backs defending a large open space.
6. 4-1-2-1-2 (Diamond)
The diamond concentrates support around the ball. Its holding midfielder, shuttlers and number 10 offer central passing angles, while the strikers can combine or threaten opposite sides of the defensive line.
Width must come mainly from the full-backs. The central overload becomes less useful if opponents can defend narrowly without being stretched outside.
A workable arrangement sends the ball-side full-back forward while the far-side full-back judges whether to advance or narrow alongside the centre-backs. The holding midfielder shouldn't be expected to protect every space alone.
Build the diamond around the opponent
Use the football formation builder guide to frame the starting structure, then position an opposition midfield around it. Label the diamond's passing angles and show the number 10 moving away from a marker before checking into the next lane.
Example practice: Arrange a diamond possession game against a central pressing group, with full-backs as wide outlets and strikers as forward targets. The objective is to draw pressure inside and recognise whether the next pass should break a line or release the outside player.
Progress from an attacking advantage to equal numbers centrally. Developing players can use a neutral support player; stronger groups can face pressure immediately after receiving.
Defensive safeguard: A full-back's advance should trigger an adjustment from the holding midfielder or far-side defender, not a hopeful recovery sprint after possession is lost.
Coach open the angle, find the far shoulder and switch before the trap closes. Repeated short passing inside a crowded diamond isn't control if nobody can play out of it.
7. 4-3-2-1 (Christmas Tree)
The Christmas tree places a pair of attacking midfielders behind a lone striker. Compared with a diamond, it gives the striker closer support between the lines but removes the second forward's permanent threat behind.
Full-backs provide width; the attacking midfielders create the central overload. The midfield trio must support them without occupying the same receiving spaces.
The main danger is congestion. If both attacking midfielders approach the ball together, the striker can become isolated despite having teammates nearby.
Separate the receiving pockets
On the board, stagger the attacking midfielders across the inside channels and at different heights. Place the striker against the last line, then show a full-back advancing outside the nearer attacking midfielder.
Example practice: The midfield trio, attacking midfielders and striker work towards goal against a compact defensive unit, with full-backs serving as wide outlets. The objective is to find a player between the lines who can turn, combine or release the outside runner.
Starting constraint: Keep the attacking midfielders in separate receiving pockets until the ball breaks a line.
Progression: Remove that restriction and allow rotations, provided someone preserves depth.
Adaptation: Give developing players more receiving space; let stronger defenders track runners and counter through wide outlets.
Coach different pockets, receive side-on and release the width when the centre closes. The striker must also recognise when to stay high rather than join every combination.
Research identifying phase-specific attacking structures supports planning these changing relationships rather than preserving a rigid lineup, as described in the study of formations across phases of play. The full-back's advance should respond to the phase and the pressure, not happen on every possession.
8. 2-3-5 and the WM Formation
The 2-3-5 and WM share a lineage but answer different problems. The pyramid commits five players to the attack; the WM pulls one back, and that single withdrawal changes the duties of everyone ahead of the ball.
The Britannica account of football strategy describes Preston North End's role in popularising the 2-3-5 and explains how Herbert Chapman withdrew the central half into defence after the 1925 offside-law change, producing the WM with three defenders, two half-backs, two inside forwards and three forwards.
The coaching value lies in the trade-off. The centre-half becomes a third defender, so the two half-backs who remain carry the midfield duties alone. Inside forwards then become the main link between the deeper block and the three forwards, and the side trades one attacking body for stability behind it.
Compare the structures on the board
Begin with the historical pyramid and label the half-backs, inside forwards and wingers. Move the centre-half backwards to create the third defender, then ask the group which player now covers the space that player leaves.
Example practice: Use a directional possession game with wide outlets, inside receivers and a central target. Defenders counter through the spaces behind the wide players, so the supporting unit must decide who steps across before another attacker advances.
Start with fixed lanes so younger groups can see the vacant space clearly. More capable groups can rotate freely, provided the attack keeps width, depth and cover while someone answers for the withdrawn player.
Use this as a lesson in formation evolution. The comparison is about responsibilities: which body defends, who replaces them in midfield, and how the attack reorganises around the reduction.
Comparing the eight attacking shapes
Formation | Main attacking strength | Where width comes from | Key risk | Best suited to |
|---|---|---|---|---|
4-3-3 | Front-three threat and flexible midfield combinations | Wingers and overlapping full-backs | Central gaps if midfielders lose position | Possession play and pressing |
4-2-3-1 | A number 10 creating between the lines | Two wide attackers, supported by full-backs | Lone striker can become isolated | Teams seeking defensive balance and a central playmaker |
3-4-3 | Front-three combinations and wide-channel overloads | Advancing wing-backs | Wing-backs can be exposed on counter-attacks | Teams with fit wing-backs and flexible centre-backs |
3-5-2 | Central midfield overloads and two-striker combinations | Wing-backs | Wide channels can be exposed when wing-backs advance | Teams seeking central control and a two-striker attack |
4-4-2 | Two-striker combinations and penalty-area threat | Wide midfielders and overlapping full-backs | Central midfield can be outnumbered | Compact defending and quick transitions |
4-1-2-1-2 (Diamond) | Central combinations through the attacking midfielder and two strikers | Full-backs | Wide areas can be exposed | Teams aiming to dominate the centre |
4-3-2-1 (Christmas Tree) | Central overloads and two attacking midfielders supporting the striker | Attacking full-backs | Limited width and possible isolation of the striker | Teams focused on central combinations |
2-3-5 (WM Formation) | Strong numerical presence and direct attacking play | Wingers and inside forwards | Limited midfield cover and vulnerability to counters | Teaching historical tactics and the evolution of formations |
From Board to Pitch Testing the Shape in a Session
A useful session begins with a football problem: the winger receives without support, the number 10 is screened, or the wing-back advances before cover arrives. The formation then provides a starting arrangement for solving that problem.
The coaching sequence is straightforward: choose the starting shape, map the football action, add the coaching detail, then export and communicate it. Every arrow should identify a recognisable trigger. A full-back overlaps because the winger has drawn the defender inside, and the diagram should record that reason behind the run.
Keep the practice connected to the match
A workable progression moves from a clear attacking advantage towards realistic pressure. Research on young footballers used 4v3 in a 35 × 20-metre area and found that greater attacking superiority benefited lower-skilled players in this study of numerical-superiority practices.
The coach can begin with more time and support, then add a recovering defender or a live counter. Touch restrictions alone raise difficulty without teaching recognition, so pressure should grow only once players consistently find the spare player.
Observe the width: Does the outside player stretch a defender or stand behind one?
Observe the overload: Can the spare player receive, or does a defender screen the pass?
Observe the transition: Who protects the central route and the vacated wide channel?
Review the outcome: Did the structure create a useful forward action, rather than possession without penetration?
TFA Tactics Board, produced by Tactical Football Analysis, supports this workflow in the browser without a software download. The free board covers starting shapes, manual player positioning, pass and run arrows, coaching notes and PNG export, while membership adds saved boards, advanced drawing tools, focused pitch views and sharing options.
Storage is local-first. Boards and coaching details live in the current browser, and member editable files and share links provide the routes for moving or presenting work beyond it.
The finished diagram should show the decision, its alternative and the covering movement. Read it back the way a player will: squad numbers clear, positions unambiguous, every arrow carrying a single meaning. A clean sketch is no proof of a rehearsed pattern, so the decisive test comes when opponents disrupt the picture and players still recognise it.
TFA Tactics Board offers browser-based formation planning, pass and run arrows, coaching notes and PNG export for communicating these attacking relationships. Visit TFA Tactics Board to map one shape's width, overload and defensive cover before building the corresponding practice.