A striker's arrow into the channel looks clear on the laptop. The players still ask the same two questions: when do we go, and why? The route is on the board. The decision is not. Types of animation movement are the grammar that turns that arrow into something a group can read, coach and test. The same path can be a sprint, a delayed support run or a pressing trigger, depending on timing, spacing and the note attached to it.
Table of Contents
Why an Arrow Alone Cannot Show a Decision
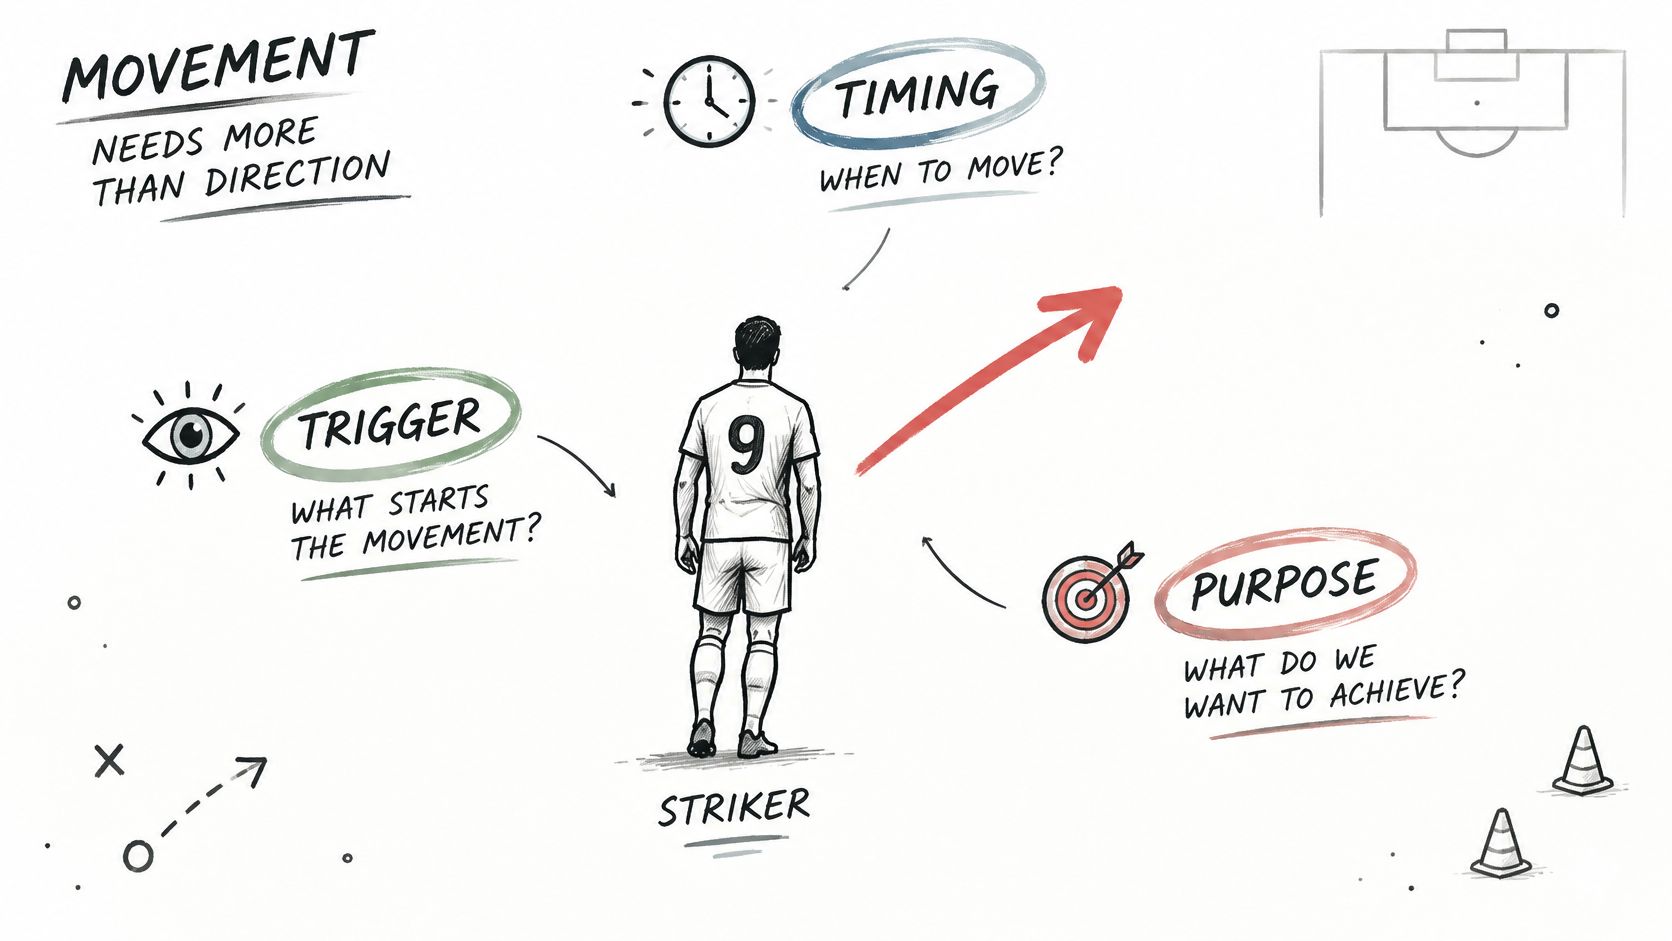
Say the session is tomorrow and the centre-forward is meant to attack the channel. A solid arrow from the striker's marker to a spot near the byline shows a destination. It doesn't show whether the run starts on the goalkeeper's throw, on the full-back's first touch, or only after a midfielder has checked away. Players then guess, and two guesses rarely match.
A movement drawing has to answer three things before it is worth showing.
Where: the space the player is heading for, not a vague direction off the pitch.
When: the moment the movement starts, including any hold before it.
What triggers it: the pass, the touch, the opponent's step, or a teammate's run.
A movement type is the visual grammar of the board: the choice of line, curve, pause, arrow or sequence. It is not decoration. Pick the mark that matches the decision, then time it.
This article uses one football tactics board as its reference. TFA Tactics Board (Free Tactics Board), by Tactical Football Analysis, runs in the browser with no software download. The free board covers formation setup and manual player positioning, the ball, pass and run arrows, labels, player numbers, team colours, coaching notes and PNG export. Curved movements, dribbles and animated phases sit with paid TFA membership, so recheck the live site before relying on a feature. By the close, a coach can choose a movement type from a reference table, time it with spacing and check the sequence before sharing it.
The Core Movement Types at a Glance
Start from the decision the players must make, then pick the row that shows that decision. A neat line that hides the reason is the wrong type.
Movement type | Board marking | What it tells players | Typical use and tool tier |
|---|---|---|---|
Straight run | Solid arrow from player to target space | Direct route into space | Striker running behind the line; free arrow |
Diagonal run | Angled arrow into a lane or half-space | Movement away from a marker | Forward cutting inside a full-back; free arrow |
Curved run | Curved line around an opponent | Movement that avoids pressure | Winger arcing inside to receive; member curve tool |
Pass | Arrow with the ball moving to a teammate | Ball transfer and the receiver | Playing into the midfielder's feet; free arrow |
Dribble | Drawn ball path with the carrier | Carrier keeps the ball while moving | Full-back carrying into midfield; member drawing tool |
Delayed or held run | Arrow with a coaching note naming the trigger | Movement starts after a cue | Support run after the carrier's first touch; free arrow and note |
Pressing step | Short arrow toward the ball carrier | Defender closes with intent | Forward stepping onto a centre-back; free arrow |
Shift or rotation | Several arrows in sequence | Group movement to cover space | Back line shifting across to cover; free arrows |
Hold | No arrow, note stating the position to keep | Player keeps width or depth | Winger holding the touchline; free note |
Match the decision, not the neatest line
Straight run. The striker sees a gap behind the line and goes directly. The arrow ends in the space, not on an opponent's toes.
Diagonal run. A forward cuts inside a full-back into the half-space. The angle shows the player leaving a marker, not charging the same channel.
Curved run. A winger arcs inside to receive on the half-turn. The curve is the point: the path avoids the nearest presser. That mark is a member drawing tool, not a free arrow bent by hand.
Pass. The ball moves to a teammate's feet. Players read who receives, not a run disguised as a pass.
Dribble. A full-back carries into midfield and keeps the ball. A member drawing tool shows the carrier's path so nobody treats it as a release.
Delayed or held run. The support run starts after the carrier's first touch. The arrow alone is not enough. The note names the cue.
Pressing step. A forward steps onto a centre-back. The arrow is short because the intent is to close, not to sprint the length of the pitch.
Shift or rotation. The back line moves across together. Several arrows in order show cover, not four independent sprints.
Hold. The winger stays on the touchline. No arrow. A note states the position to keep, so width is a decision rather than a forgotten player.
Practical rule: If the reason for an arrow can't be named in one sentence, the movement type is probably wrong, or the arrow isn't needed.
How Timing and Spacing Change the Message
Two movements with the same start and the same end can still mean different things. What changes is how the positions are spaced in time. Motion-design research in the Idealogy journal treats timing, spacing and rhythm as factors in visual clarity: evenly spaced positions read as constant speed, compressed spacing near the start and wider spacing later reads as acceleration, and the reverse reads as deceleration. On a tactics board, that spacing is the difference between a delayed supporting run and an immediate sprint. Semantic timing matters more than cinematic smoothness.
Spacing pattern | Reads as | Football example |
|---|---|---|
Even spacing | Steady pace | Full-back recovering at a constant speed |
Tight early, wide late | Acceleration | Winger bursting into a channel after the trigger |
Wide early, tight late | Deceleration | Striker easing into a check to the ball |
Long hold, then short move | Delayed support | Midfielder waiting for the carrier's first touch |
Short stutter, then move | Pressing trigger | Defensive midfielder jolting to close a passing lane |
Five patterns, five decisions
Even spacing is a recovery at one speed. A full-back jogging back into the line shouldn't look like a burst.
Tight early, wide late is acceleration. The winger is quiet, then the channel opens and the run lengthens. Urgency sits in the second half of the move.
Wide early, tight late is deceleration. The striker checks to the ball and arrives under control, rather than flying through the receiving spot.
A long hold, then a short move is delayed support. In this example, a central midfielder must wait for the ball carrier's first touch before stepping in. Draw a hold, not a constant-speed arrow, or the viewer thinks the midfielder is already arriving.
A short stutter, then a move is a pressing trigger. The defensive midfielder pauses on the cue, then jolts to close the lane. The stutter is the decision.
Hold the initial shape long enough for the viewer to read the defensive block before the first movement begins. Use a short transition for a pressing trigger, and stagger individual movements so the order stays readable. Those timings only land if they sit on distinct states of the board.
Keyframes and Sequencing a Multi-Player Move
A keyframe is a state that matters. The coach sets those states, and the board fills what sits between them. In practical football animation, keyframe work on articulated motion places those states on tactical events and generates the frames in between. For limb-like rotation, interpolating angles directly can kink a movement, which is why a tactics board should key the change of direction itself. One smooth curve across the whole move can hide the turn. Each state you place is a claim about the moment: the run started here, the pass left here, the defender reacted here.
Four states, in order
Initial shape. Nothing has moved. The block, the ball and the spaces are readable.
Reception. The midfielder receives. Body shape and the first picture of pressure are set.
Triggering run. The player who starts the idea moves. This is the cause.
Final pass or defensive reaction. The consequence: the ball goes, or the line reacts.
Add another keyframe wherever direction, speed or role changes sharply. Too few keyframes leave uneven jumps. Too many slow the edit and bury the idea.
The chain and who actually moves
Sequence the idea as trigger, anticipation, acceleration, arrival and consequence. A supporting run can begin before the carrier's action, so the support is already on the way when the picture changes. Delay the defender's reaction by a beat so the viewer reads it as a response that follows the run.
Move the ball carrier and two or three players who change the picture. Add a secondary movement only when it explains space, cover or rotation. A full-pitch shuffle hides the cause. The same discipline shows up when a side changes the point of attack, which is why a switch of play session on the tactics board is easier to coach when the first pass and the far-side run stay readable.
Play the sequence once. A coach who hasn't seen the idea should be able to name who triggered the move and when. If that person can't, the keyframes are in the wrong places.
A Worked Example of Supporting Movement from the Back
This is an example, not a match report. A 4-3-3 is set with the browser formation setup. The centre-back, shirt 4 in this example, has the ball. The aim is support from the back so the first pass has more than one angle, and the next pass can go forward through pressure.
A FIFA Talent Coach session on support and off-the-ball movement builds the same idea from a diamond passing circuit into a 6v4 possession game, then a 6v6 plus 6, and finishes with an 11v9 that carries the earlier principles into a more realistic game. Players form a diamond around the ball carrier, open the body before receiving, and use firm, incisive passes to play through pressure.
Four stages on the board
Initial diamond. The defensive midfielder (8) and the two nearest midfielders (6 and 10) sit around the centre-back. Several passing angles exist before the ball moves.
Cue: "Diamond before you pass."
Supporting adjustment. The nearest midfielder shifts a few metres to keep the angle, rather than stopping and waiting to be found.
Cue: "Adjust the angle, don't freeze."
Receiver's body orientation. The receiving midfielder shows an open body before the pass arrives. A note states what that player can see: the forward lane and the weak-side option.
Cue: "Open body, see two options."
Final forward pass. A firm pass plays the attacker, 9 in this example, through the pressure line. The arrow is the ball, not another run.
Cue: "Firm, forward, through the line."
How the example grows
For less experienced players, use fewer opponents and a longer hold before the pass, closer to the 6v4 picture. For more experienced players, add a pressing opponent who must react, then move toward the 6v6 plus 6 and the 11v9. Check every shirt number, position and arrow by hand before the diagram is shared. One wrong end point teaches the wrong space.
Common Board Mistakes and How to Fix Them
A drawn route can sit in exactly the right place and still coach the wrong behaviour. Say a midfielder is meant to hold a wide position for two beats while the centre-back carries the ball. If the arrow fires the moment the pass leaves the centre-back's foot, players copy what moves first, and the board teaches a sprint where the coach wanted patience.
Symptom | Likely cause | Fix |
|---|---|---|
All players look like they move at once | Too many moving objects | Limit motion to three or four players and stagger the starts |
A pass line reads as a run | Ball and runner marks look the same | Add a note stating whether the line is the ball or a runner |
An arrow ends in the wrong place | Loose manual positioning | Drag or reposition the player manually and recheck the end point against the intended space |
The trigger is unclear | No note at the moment of the cue | Add a coaching note naming the trigger player and the cue |
Routes show but decisions do not | Arrows without a stated reason | Attach a note that states the decision behind the path |
Fixes that don't need a new drawing
Player positioning, arrows and notes on the free board cover these repairs. Dribbles, curves, zones and spotlights are member tools, and none of the mistakes above require them.
When an arrow finishes a metre off the intended lane, select the player or the end of the mark and nudge it. Arrow keys move the selected object, and holding Shift makes the steps larger. Then look again at the space the note describes. A tidy arrow into the wrong pocket is still a bad cue.
Apply the same note test used for the core movement types: a note that only describes the line leaves the decision off the board.
Before publication, check shirt numbers, positions and what each arrow means. Players will treat the fastest-looking line as the instruction, so a diagram that leaves the laptop unchecked gets coached as drawn, mistake included.
Test the Movement in a Practice Progression
A board picture is a hypothesis until players meet it. FIFA Training Centre's session-design guidance divides a session into three phases. The skill-development phase uses fewer players in a tighter area and high repetition. The progression phase adds players and space, so repetition drops and decisions rise. The game phase uses most or all of the group in a larger, match-like setting, with decisions tied to real scenarios. The same guidance asks the session to reflect the four moments: in possession, transition to defend, out of possession and transition to attack.
The board should show that change of phase as a connected sequence. The support run drawn for the skill phase is the same run in the game phase, with more pressure around it, so the note naming the trigger has to survive each step up.
Draw the core movement with the chosen type, the spacing and a note that names the trigger.
Run it in the skill-development phase with the ball carrier and two or three relevant players.
Add opponents and space in the progression phase, and watch whether the run still starts on the cue.
Test it in the game phase under realistic pressure.
A guide to small-sided games can bridge the diagram and the full pitch, because the same movement can be repeated in a tight area before it is opened up. If the run only appears when nobody presses, the hold or the spacing on the board needs another look.
TFA Tactics Board plays a drawn movement as an animated sequence, so the timing set on the board is the timing players watch. Use it to show when a run starts and what triggers it, as well as where the arrow ends. Open TFA Tactics Board and draw one movement with a hold, a note and a clear trigger before the next session.